Easy Keto Broccoli Cheese Stuffed Chicken Breasts: A Family-Favorite Low-Carb Recipe
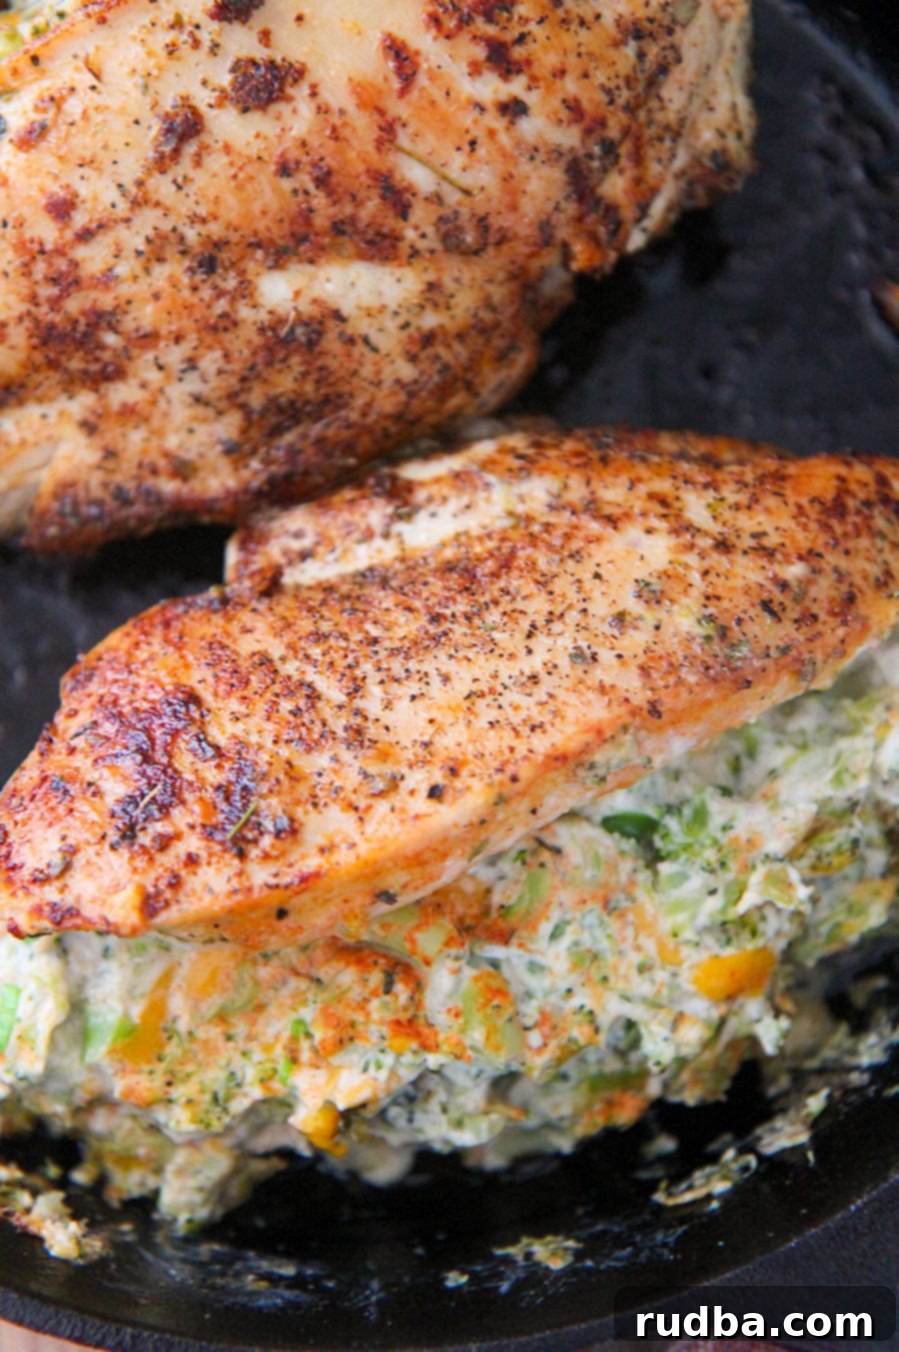
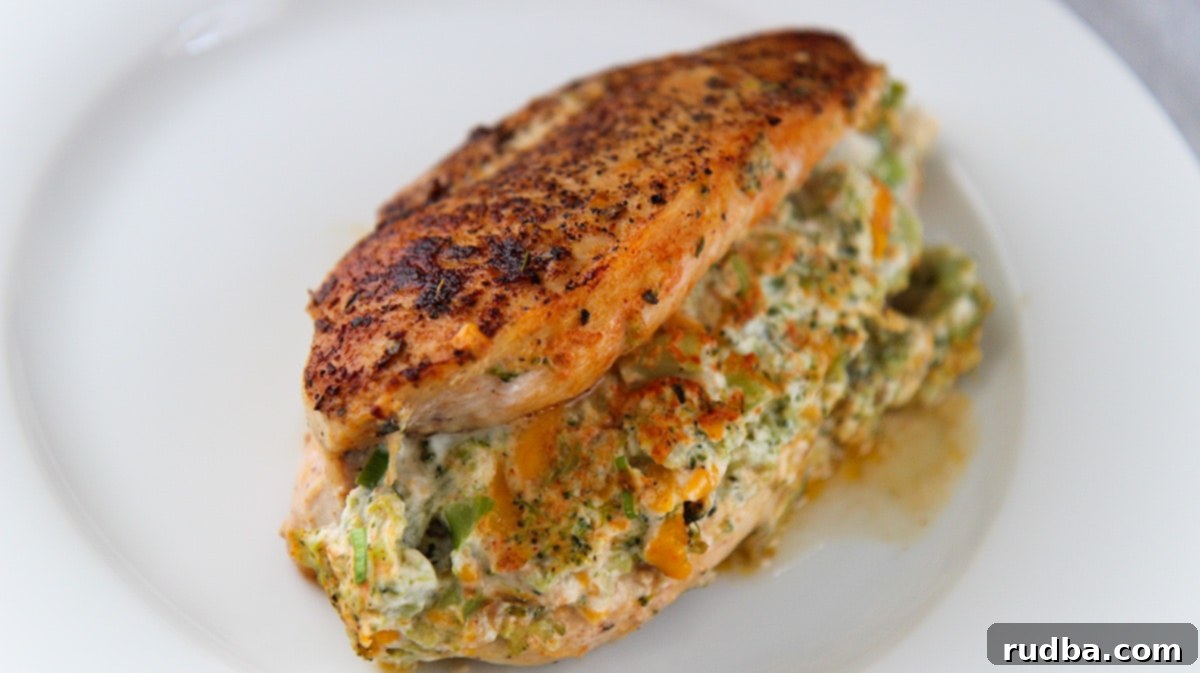
Prepare to fall in love with these incredibly flavorful and satisfying Broccoli Cheese Stuffed Chicken Breasts! Each tender chicken breast is generously filled with a creamy, cheesy mixture of softened cream cheese, sharp cheddar, and tender broccoli. This recipe isn’t just delicious; it’s also wonderfully low-carb and keto-friendly, making it a perfect choice for those watching their carb intake without sacrificing taste. Whether you’re cooking for picky eaters or sophisticated palates, this dish is consistently a hit with both kids and adults, guaranteeing an empty plate every time.
What makes this recipe truly stand out is its simplicity and speed. You can have a gourmet-tasting meal on the table in just about 30 minutes from start to finish. It’s packed with incredible flavor, surprisingly easy to prepare, and calls for readily available ingredients. What more could you ask for in a weeknight dinner? I personally crafted this recipe using boneless, skinless chicken breasts for convenience and quicker cooking, but feel free to opt for skin-on, bone-in chicken breasts if you prefer a richer flavor profile. Just remember that bone-in chicken will require a longer cooking time to reach the safe internal temperature of 165 degrees F.

Why You’ll Love This Broccoli Cheese Stuffed Chicken Recipe
Beyond its delicious taste, this recipe offers several compelling reasons to become a staple in your meal rotation:
- Effortlessly Delicious: The combination of creamy cheese and fresh broccoli creates a filling that perfectly complements the juicy chicken.
- Quick & Easy: With only 10 minutes of prep and 20 minutes of cook time, it’s ideal for busy weeknights.
- Low-Carb & Keto-Friendly: A fantastic option for anyone following a ketogenic or low-carb diet, proving that healthy eating can be incredibly flavorful.
- Kid & Adult Approved: The creamy, cheesy filling is universally appealing, making it a stress-free dinner choice for families.
- Versatile: Easily customizable with different vegetables, cheeses, and seasonings to suit your personal preferences.
- Nutrient-Rich: Packed with protein from the chicken and essential vitamins from the broccoli, it’s a wholesome meal.
Mastering the Art of Stuffing Chicken Breasts
Stuffing chicken breasts might sound intimidating, but it’s a straightforward process once you know the technique. The key is to create a pocket without cutting all the way through the chicken, allowing it to hold the delicious filling. Here’s a detailed guide:
- Butterfly the Chicken: Start by placing your hand flat on top of a boneless, skinless chicken breast. Using a sharp knife, carefully slice horizontally through the thickest part of the chicken, from one side to the other, but stop about a half-inch from the opposite edge. This creates a “hinge” that allows the chicken to open like a book. This method ensures you have ample space for the filling while keeping the chicken breast intact.
- Season Generously: Once butterflied, open up the chicken breast and season both the inside and outside generously with salt, pepper, and your chosen spice blend (granulated garlic, onion powder, paprika, and Italian seasoning work wonders here). Don’t skip this step, as it’s crucial for building deep flavor throughout the dish.
- Spread the Filling: On one half of the butterflied chicken, spread an even layer of your creamy broccoli and cheese mixture. Be mindful not to overfill, as this can make it difficult to close and cause the filling to spill out during cooking. About ¼ cup per breast is usually perfect.
- Close and Secure: Gently fold the other half of the chicken breast over the filling, closing it securely. If the chicken doesn’t stay closed or you’re worried about the filling oozing out, you can use one or two toothpicks to hold the edges together. Just remember to remove them before serving!
Customization: Can I Use Other Vegetables or Cheeses?
Absolutely! This recipe is incredibly adaptable, inviting you to experiment with your favorite ingredients. While broccoli and cheddar are a classic combination, don’t hesitate to get creative. Here are some fantastic alternatives and additions:
- Spinach: As mentioned, fresh or frozen (thawed and squeezed dry) spinach is an excellent substitute for broccoli. It adds a lovely earthy flavor and vibrant green color.
- Mushrooms: Finely diced and sautéed mushrooms can add a rich, umami depth to the filling.
- Sundried Tomatoes: Chop them finely and mix them into the cream cheese for a burst of sweet and tangy flavor.
- Bell Peppers: Finely diced red or yellow bell peppers can add a touch of sweetness and color.
- Different Cheeses: If cheddar isn’t your favorite or you’re looking for variety, try mozzarella for a milder, stretchier cheese, pepper jack for a spicy kick, or even a blend of Gruyère and Parmesan for a more sophisticated flavor. Any good melting shredded cheese you have on hand will likely work well.
- Herbs & Spices: Beyond the suggested seasonings, consider adding fresh chives, a pinch of red pepper flakes for heat, or a dash of smoked paprika for extra depth.
Feel free to mix and match to discover your perfect stuffed chicken combination!
Top Tips For The Ultimate Broccoli Cheese Stuffed Chicken
Achieving perfectly cooked, juicy, and flavorful stuffed chicken breasts is easy with these expert tips:
- Choose Thick Chicken Breasts: Avoid thinly sliced chicken breasts. Thicker breasts are much easier to butterfly and hold the filling without tearing. If your chicken breasts are uneven, you can gently pound the thicker parts to an even thickness (about 1 inch) before butterflying.
- Pre-Cook the Broccoli: Always cook the broccoli (either in the microwave until tender-crisp or by blanching it in boiling water) before mixing it with the cream cheese. This ensures the broccoli is tender and not crunchy in the final dish, and it prevents excess moisture from being released into the filling during baking.
- Season Generously: Don’t be shy with the seasonings! Chicken can be bland, so make sure to season both sides of the butterflied chicken breast and the filling itself with salt, pepper, and your spice blend. This builds layers of flavor.
- Sear Before Baking: This step is crucial for developing a beautiful golden-brown crust and locking in moisture. Cook the chicken in a hot, oven-safe skillet with oil for 3-4 minutes on each side until it has a nice color. Then, transfer the skillet directly to the oven to finish cooking. This creates a more complex flavor and appealing texture.
- Internal Temperature is Key: Always cook chicken until its internal temperature reaches 165 degrees F (74 degrees C) at its thickest part, using a meat thermometer. This ensures the chicken is safely cooked through and remains juicy without being overcooked.
- Cheese Alternatives: As mentioned, if cheddar isn’t available, mozzarella cheese, pepper jack, or a blend of other shredded cheeses like Colby Jack or Monterey Jack can be excellent substitutes. The goal is a creamy, melty interior.

Perfect Pairings: What to Serve with Stuffed Chicken
This savory stuffed chicken breast pairs wonderfully with a variety of side dishes, complementing its rich flavors. For a complete and satisfying dinner, consider these options:
- Creamy Mashed Potatoes: A classic comfort food that perfectly balances the savory chicken.
- Honey Roasted Carrots: Adds a touch of sweetness and a vibrant color to your plate.
- Cauliflower Mash: For a continued low-carb option, creamy cauliflower mash is an excellent substitute for traditional mashed potatoes.
- Steamed or Roasted Asparagus: Simple, healthy, and adds a nice crisp texture.
- Green Bean Almondine: A quick and elegant vegetable side dish.
- Simple Side Salad: A light, refreshing salad with a vinaigrette dressing can cut through the richness of the cheese.
- Quinoa or Brown Rice: For those not strictly adhering to keto, these grains offer a wholesome carbohydrate component.
Storage and Reheating Instructions
Leftovers of this delicious stuffed chicken are just as good the next day, making it perfect for meal prepping!
- Storage: If you have any leftovers, allow the chicken to cool completely before transferring it to an airtight container. Refrigerate promptly for up to 2-3 days.
- Reheating: To reheat, you can use a microwave for a quick warm-up, though the chicken might be slightly less tender. For best results, reheat in the oven at 300°F (150°C) for about 15-20 minutes, or until warmed through, to help retain moisture and prevent the chicken from drying out. You can also cover it loosely with foil during reheating.
Frequently Asked Questions (FAQ)
Here are answers to some common questions you might have about making broccoli cheese stuffed chicken:
Can I use frozen broccoli?
Yes, you can! Just be sure to thaw it completely and squeeze out as much excess water as possible before chopping and mixing it into the cream cheese. This prevents the filling from becoming watery.
How do I prevent the cheese from oozing out?
Ensure you don’t overfill the chicken breasts. Also, using toothpicks to secure the edges is very effective. Searing the chicken first helps to “seal” the edges somewhat, and cooking in an oven-safe skillet also helps contain any minor spillage.
Can I prepare this recipe ahead of time?
Yes, you can! Assemble the stuffed chicken breasts (without cooking) and store them in an airtight container in the refrigerator for up to 24 hours. When ready to cook, proceed with searing and baking as directed, adding a few extra minutes to the cooking time if starting from cold.
Is this recipe gluten-free?
Yes, this recipe is naturally gluten-free, assuming all your ingredients (like seasonings) are also gluten-free. It’s a great option for those with gluten sensitivities.
What if I don’t have an oven-safe skillet?
No problem! You can sear the chicken in a regular skillet on the stovetop and then carefully transfer the seared chicken breasts to a baking dish to finish cooking in the oven. Just ensure your baking dish is suitable for oven temperatures.

Broccoli Cheese Stuffed Chicken
Save RecipeSaved Recipe
Pin Recipe
Rate Recipe
Print Recipe
Ingredients
- 4 chicken breasts , boneless and skinless
- 2 cups cooked broccoli , finely chopped
- 8 ounces cream cheese, softened
- 1/2 cup cheddar cheese
- 2 tbsp scallions
- 1 1/2 tsp granulated garlic , divided
- 1 tsp onion powder
- 1 tsp Italian seasoning
- 1 tsp paprika
- 2 tbsp oil
- salt and pepper to taste
Instructions
-
Preheat your oven to 400 degrees F (200 degrees C) to ensure it’s ready when the chicken goes in.
-
In a large mixing bowl, combine the softened cream cheese, shredded cheddar cheese, finely chopped cooked broccoli, 1/2 tsp granulated garlic, and sliced scallions. Season with salt and pepper to taste. Mix these ingredients thoroughly until well combined and creamy.
-
In a separate small bowl, prepare your spice blend by combining the remaining granulated garlic, onion powder, paprika, and Italian seasoning. This blend will be used to season the chicken.
-
To butterfly each chicken breast, place your hand flat on top of the breast. Carefully slice horizontally through the thickest part, stopping about a half-inch from the opposite side, creating a pocket. Open the chicken like a book and generously season both the inside and outside with salt, pepper, and your prepared spice blend.
-
Take approximately 1/4 cup of the broccoli and cheese mixture and spread it evenly on one side of each butterflied chicken breast. Carefully close the chicken breast over the filling. If needed, use one or two toothpicks to secure the edges and prevent the filling from escaping during cooking.
-
Heat 2 tablespoons of oil in an oven-safe skillet over medium-high heat. Once hot, carefully place the stuffed chicken breasts in the skillet. Cook for 3-4 minutes on each side until beautifully golden brown. This searing step adds a wonderful crust and seals in the juices. After searing, transfer the skillet directly to the preheated oven and bake for an additional 12 minutes, or until the thickest part of the chicken reaches an internal temperature of 165 degrees F (74 degrees C) using a meat thermometer.
-
Carefully remove the skillet from the oven. Let the chicken rest for a few minutes before serving. Remember to remove any toothpicks before you and your loved ones enjoy this delicious, warm meal!
Video
Nutrition
Nutrition information is automatically calculated, so should only be used as an approximation.
Additional Info
Like this recipe? Leave a comment below!
For more delicious recipes and cooking tutorial videos, make sure to visit Youtube and Facebook.
