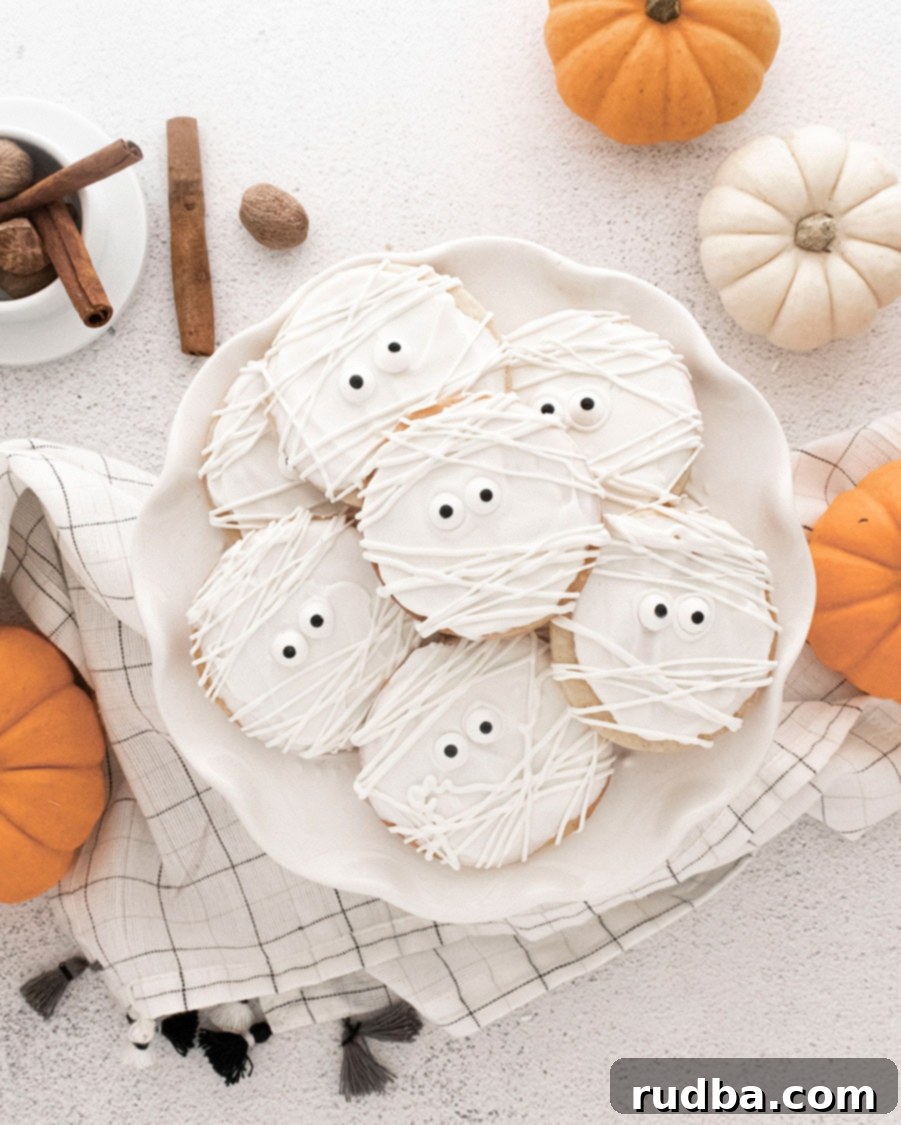
Spooky & Sweet Halloween Mummy Cookies: An Easy Shortbread Recipe
Get ready to wrap up some spooky fun this Halloween with these absolutely adorable and incredibly delicious Mummy Cookies! Perfect for parties, school treats, or just a festive evening at home, these soft, buttery shortbread cookies are transformed into charming mummies with a simple coating of white candy melts and expressive candy eyes. They’re a treat that’s as delightful to look at as it is to eat, making them a must-have for your seasonal baking.
This time of year, when the leaves change and the air gets crisp, my kitchen always fills with the inviting aroma of baking. There’s something extra special about creating treats that capture the spirit of the season, and these mummy cookies do just that. They blend the comforting, tender bite of classic shortbread with a fun, whimsical Halloween theme. Each cookie is a little piece of edible art, guaranteed to bring smiles to faces of all ages.
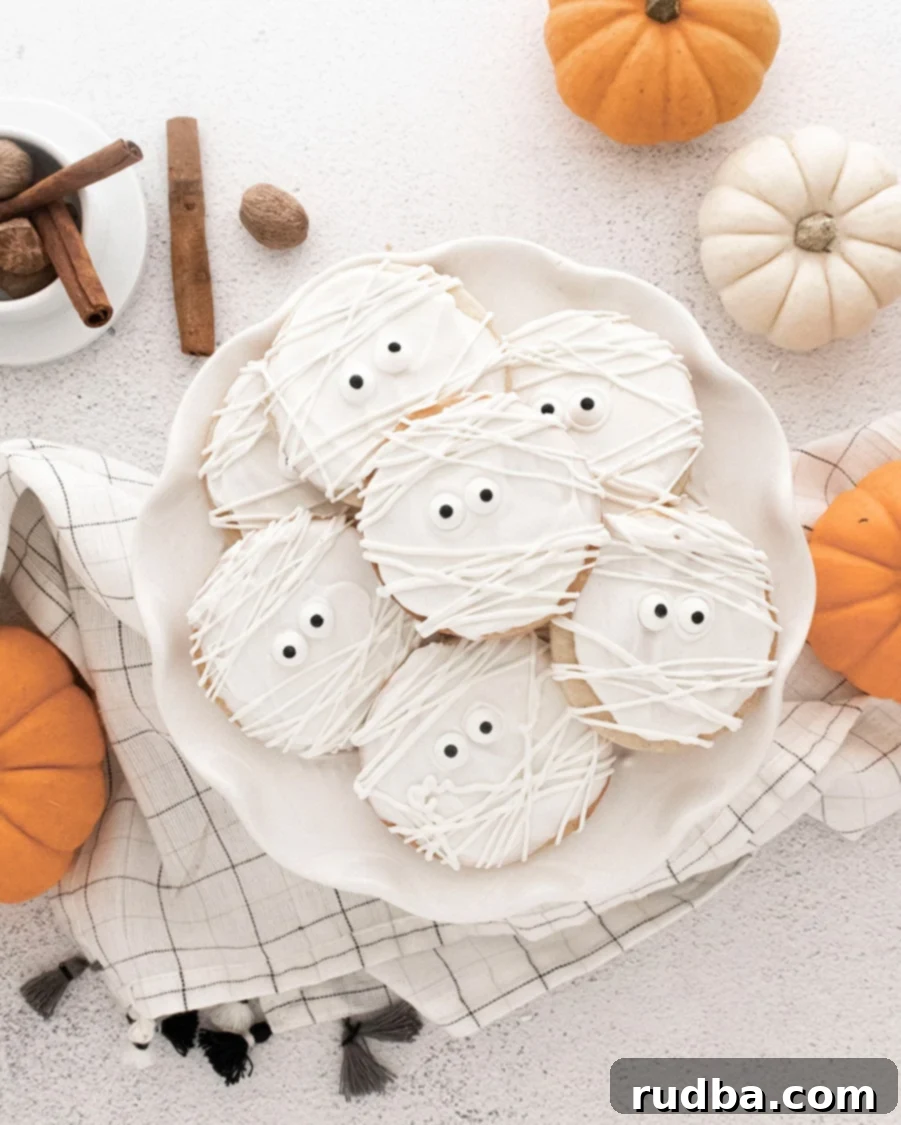
Why These Mummy Cookies Are Your New Halloween Favorite
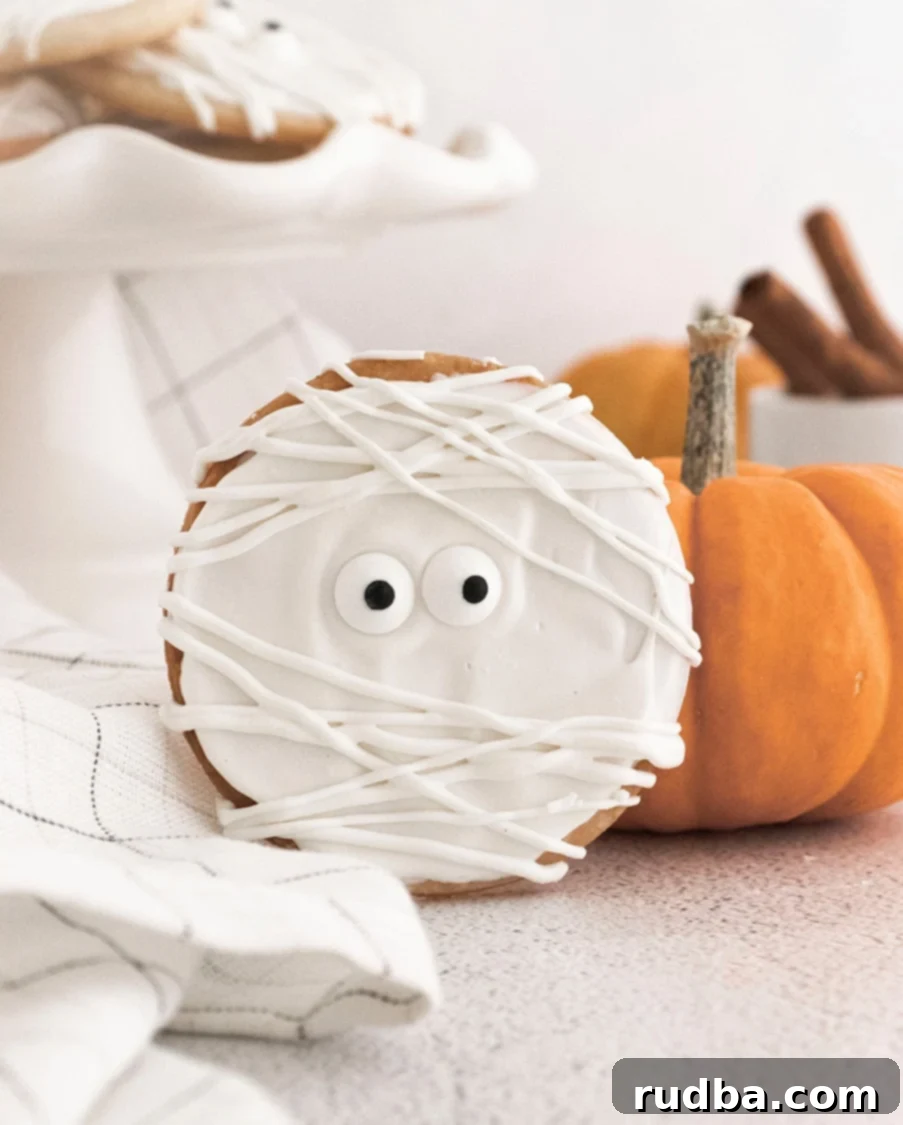
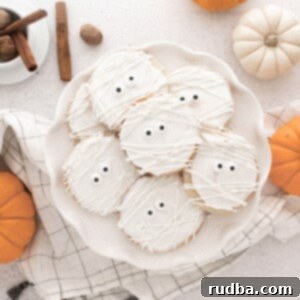
Our Mummy Cookies start with a rich, buttery shortbread base, subtly infused with the warm notes of vanilla and a hint of cinnamon and nutmeg. This isn’t just any cookie; it’s a tender, melt-in-your-mouth experience that serves as the perfect canvas for our spooky decoration. Once baked to golden perfection, each cookie is generously coated in pure white candy melts, then adorned with whimsical candy eyes and artfully drizzled “mummy wrap” lines. The contrast between the delicate cookie and the creamy, sweet coating is simply irresistible.
Beyond their charming appearance, these cookies are incredibly satisfying. The simple yet effective decoration process makes them a fantastic baking project for families, allowing even little ghouls and goblins to help create their own mummy masterpieces. The best part? They’re so delicious, you’ll be reaching for more than just one – that’s a guarantee!
Step-by-Step Guide to Crafting Your Spooky Mummy Cookies
Creating these delightful mummy cookies is a straightforward process, perfect for bakers of all skill levels. Follow these detailed steps to ensure your cookies turn out perfectly tender and wonderfully spooky.
-
Prepare the Butter for a Tender Base
Begin by creaming the softened unsalted butter in a stand mixer fitted with a paddle attachment for about 2 minutes. This crucial step incorporates air, making your cookies exceptionally light and fluffy. Once light and airy, add the powdered sugar, vanilla extract, ground nutmeg, ground cinnamon, and salt. Mix on low speed for just about 1 minute, or until all the ingredients are fully combined and the mixture is smooth. Be careful not to overmix at this stage.
-
Form the Dough with Care
With your mixer still on low speed, gradually add the all-purpose flour and whole milk, alternating between the two. Add half of the flour, mix until just combined, then add half of the milk, mix, and repeat until all the flour and milk are incorporated. The dough should come together to form a soft ball. Remove the dough from the mixer and gently shape it into a flat disc. Wrap the dough tightly in plastic wrap and chill it in the refrigerator for at least 15 minutes. This chilling period helps the butter firm up, preventing the cookies from spreading too much during baking.
-
Preheat Oven and Roll Out Dough
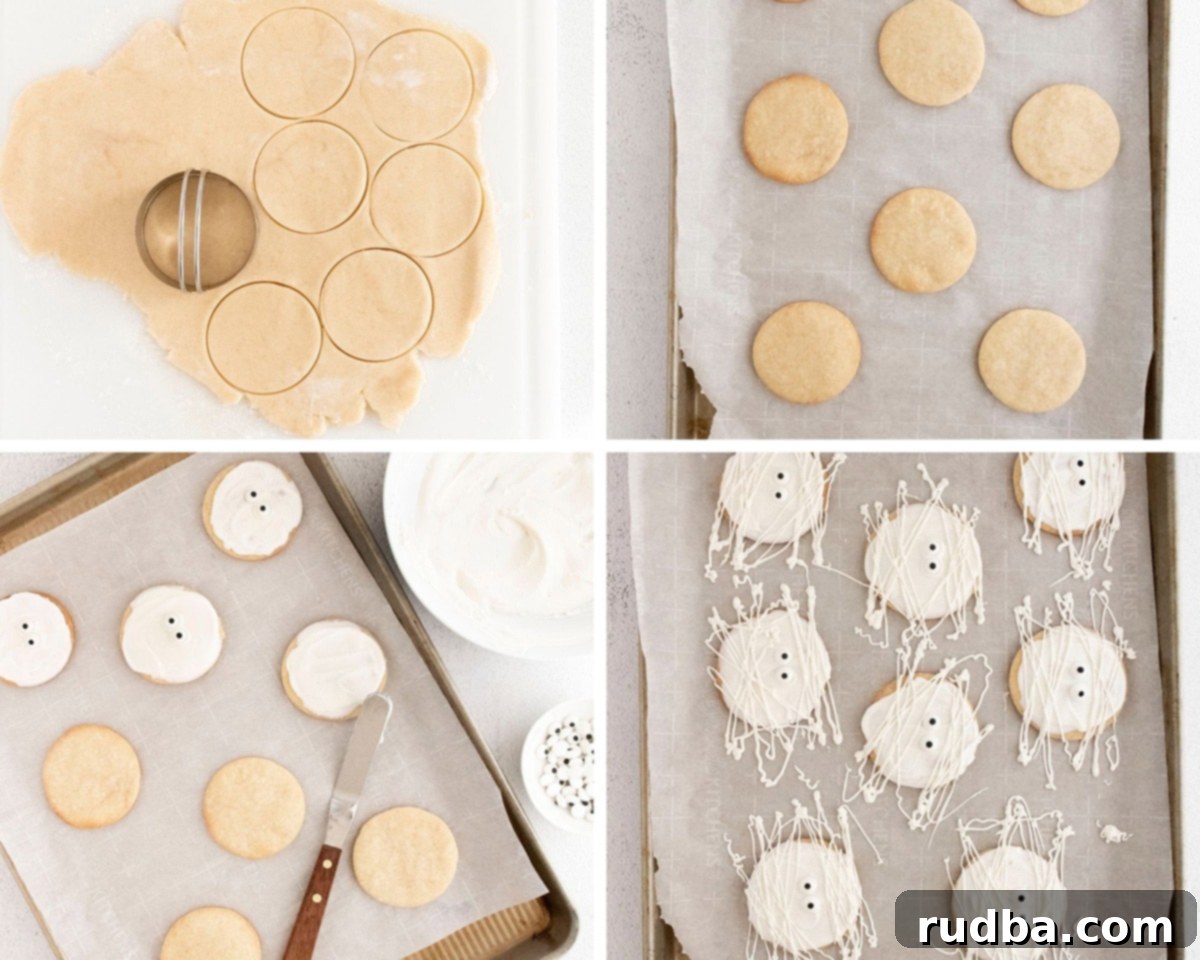
While your dough is chilling, preheat your oven to 375°F (190°C) and line a baking sheet with parchment paper. Lightly flour a clean work surface and your rolling pin. Take the chilled dough and roll it out evenly to about ¼ inch (approximately 6mm) thick. Use a 2-inch (5cm) round cookie cutter, lightly floured to prevent sticking, to cut out individual cookie circles. This size typically yields about 12 perfect cookies.
-
Bake to Golden Perfection
Carefully transfer the cut-out cookies to your prepared baking sheet, ensuring they are placed about 1 inch (2.5 cm) apart. Bake for 10 to 12 minutes, or until the edges of the cookies just begin to turn a light golden brown. The centers should still be pale. Once baked, remove the baking sheet from the oven and allow the cookies to cool completely on the tray before attempting to decorate them. Cool cookies are essential for smooth candy melt application.
-
Prepare Your Decorations
To prepare for decorating, melt your bright white candy melts. You can do this in the microwave at half power, stirring every 30 seconds until completely smooth, or follow the package instructions for best results. Candy melts are preferred over white chocolate for their brighter color and easier working consistency. Once melted, set aside approximately ¼ of the total melted candy in a small piping bag (or a Ziploc bag with a corner snipped off) for creating the mummy wrappings later.
-
Dip, Add Eyes, and Create Wrappings
Dip each cooled cookie into the remaining melted candy melts, ensuring the entire surface is covered. Use an offset spatula or the back of a spoon to gently smooth any excess. Immediately after dipping, while the candy melt is still wet, place two candy eyes onto each cookie. Allow the candy coating to set slightly. Once all cookies have eyes, take your reserved piping bag of candy melt and drizzle thin, horizontal lines across each cookie, overlapping slightly to create the distinct “mummy wrap” effect. Allow the cookies to dry completely on a wire rack before enjoying or storing. This typically takes about 15-30 minutes, or you can speed it up by placing them in the refrigerator for 5-10 minutes.
Expert Tips for Flawless Mummy Cookies
Achieving bakery-quality mummy cookies is easy with a few insider tricks. These tips will ensure your cookies are not only delicious but also beautifully decorated for your Halloween festivities.
-
Elevate Vanilla Flavor: For an exceptionally rich and aromatic vanilla flavor, consider swapping the vanilla extract for an equal amount of vanilla bean paste, or scrape the caviar from one whole vanilla bean directly into your dough. The tiny specks of vanilla will also add a gourmet touch to your shortbread.
-
Milk Options: This recipe is versatile when it comes to milk! Both dairy (like whole milk) and non-dairy alternatives (such as almond or oat milk) work beautifully, ensuring your cookies retain their tender texture. Choose what you have on hand or what suits dietary preferences.
-
Fresh Nutmeg for Best Aroma: While pre-ground nutmeg is convenient, freshly grated nutmeg offers a significantly more potent and fragrant flavor. Invest in a whole nutmeg and a small grater for the best possible spice profile in your shortbread.
-
Consistent Thickness is Key: To ensure all your cookies bake evenly and have that perfect shortbread texture, roll the dough out consistently to ¼ inch thick. Using a 2-inch cookie cutter will yield approximately 12 perfectly sized mummy cookies.
-
Make-Ahead Dough: Save time on the day of your event by preparing the cookie dough up to 24 hours in advance. Wrap it tightly in plastic wrap and refrigerate. When ready to bake, let the dough come to room temperature for about 45 minutes before rolling and cutting, making it easier to work with.
-
Candy Melts for Superior Decoration: For that pure, bright white mummy look and an easier decorating experience, always opt for candy melts over traditional white chocolate. Candy melts are formulated to melt smoothly, set quickly, and maintain their brilliant color without tempering, unlike white chocolate.
-
Cool Completely: Patience is a virtue, especially when decorating! Ensure your cookies are completely cool before dipping them in the melted candy. Warm cookies will cause the candy melts to seize or create a messy, uneven coating.
-
Piping Bag Precision: For neat mummy wrappings, use a small piping bag or a Ziploc bag with a tiny corner snipped off. This gives you greater control over the thin lines, making your mummies look more authentic and appealing.
Storage and Make-Ahead Options
These mummy cookies are best enjoyed within 2 days of decorating. Once completely dry, store them in an airtight container at room temperature. For longer storage, you can freeze the undecorated baked cookies for up to 3 months. Thaw them at room temperature before decorating. The raw dough can also be prepared a day in advance and kept refrigerated until you’re ready to roll and bake.
Serving Suggestions for Your Halloween Party
Mummy cookies are the quintessential Halloween party treat! Arrange them on a platter alongside other festive goodies like pumpkin-shaped brownies or spiderweb cupcakes. They also make fantastic edible party favors when individually wrapped in clear cellophane bags. For a fun activity, let kids decorate their own pre-baked and cooled cookies, offering various sprinkles and small candies in addition to the traditional eyes and wrappings.
Frequently Asked Questions About Mummy Cookies
- Q: Can I use regular white chocolate instead of candy melts?
- A: While you can, candy melts are highly recommended. They are designed to melt smoothly and set quickly with a bright white color, making the decorating process much easier and giving you that distinct mummy look. Regular white chocolate can be temperamental and may not achieve the same bright white, smooth finish without proper tempering.
- Q: How can I prevent my shortbread cookies from spreading?
- A: The key is chilling the dough! Ensure you chill the dough for at least 15 minutes as instructed. Also, avoid overworking the dough, which can develop gluten and lead to spreading. Make sure your butter is softened but not melted, and your oven is accurately preheated.
- Q: Can I make these cookies gluten-free?
- A: Yes, you can! Substitute the all-purpose flour with a 1:1 gluten-free baking flour blend that contains xanthan gum. The texture might be slightly different, but the flavor will still be delicious.
- Q: What if I don’t have a stand mixer?
- A: No problem! You can use a hand mixer to cream the butter and incorporate the sugar and other wet ingredients. For adding the flour and milk, you can continue with the hand mixer on low speed or switch to a sturdy spatula or wooden spoon to mix until just combined.
- Q: How long do these mummy cookies stay fresh?
- A: Once decorated and fully set, these cookies will stay fresh in an airtight container at room temperature for up to 2 days. For optimal freshness and texture, consuming them within the first day or two is best.
If you enjoyed these delicious and fun mummy cookies, you’ll be thrilled to discover more sweet treats and baking adventures. Explore our other fantastic cookie recipes, perfect for any occasion!
You will also enjoy these M&M Cookies, a colorful and chewy delight for chocolate lovers. These Italian Lemon Ricotta Cookies are also fantastic, offering a light, zesty, and subtly sweet experience. For even more delicious recipes and cooking tutorial videos, be sure to follow us on Youtube and Facebook!
Mummy Cookies
Julie Maestre
10 minutes
10 minutes
15 minutes
35 minutes
12
Save RecipeSaved Recipe
Pin Recipe
Rate Recipe
Print Recipe
Ingredients
-
1/2
cup
unsalted butter ,
softened -
1/4
cup
powdered sugar -
2
tsp
vanilla extract -
1/2
tsp
ground nutmeg -
1/2
tsp
ground cinnamon -
1/2
tsp
salt -
1
cup
all-purpose flour -
2
tbsp
whole milk
To Decorate
-
1
cup
bright white candy melts -
24
candy eyes
Prevent your screen from going dark
Instructions
-
With a paddle attachment in your stand mixer beat the butter for 2 minutes or until light and fluffy. Add the powdered sugar, cinnamon, nutmeg, salt, and vanilla extract and mix on low speed for 1 minute, or until just combined.
-
Keep your mixer on low and alternate adding the flour and milk, 1/2 of each at a time. When the dough forms a ball remove it and shape it into a disc. Wrap and chill for 15 minutes.
-
Preheat your oven to 375°F and line a baking sheet with parchment paper. Roll chilled dough out on a lightly floured surface to ¼ inch thick. Cut with a 2 inch, lightly floured, circle cookie cutter to form 12 cookies.
-
Bake 1 inch apart for 10 to 12 minutes or until the edges are just starting to brown. Remove and let cool to room temperature on the baking sheet.
-
To decorate, melt candy melts at half power in your microwave, stirring every 30 seconds until melted, or according to the package instructions.
-
Set aside ¼ of the total melted candy in a small bag. Dip each cookie into the remaining chocolate and smooth with an offset spatula. Add two eyes per cookie while the candy melt is still wet.
-
When all the cookies are dipped, snip the corner off the bag of remaining chocolate and drizzle each cookie with horizontal lines to create mummy wrappings. Allow to dry completely before eating. Store up to 2 days in an airtight container once dry.
Nutrition
Calories:
120
kcal
|
Carbohydrates:
11
g
|
Protein:
1
g
|
Fat:
8
g
|
Saturated Fat:
5
g
|
Cholesterol:
21
mg
|
Sodium:
99
mg
|
Potassium:
14
mg
|
Fiber:
1
g
|
Sugar:
3
g
|
Vitamin A:
236
IU
|
Calcium:
8
mg
|
Iron:
1
mg
Nutrition information is automatically calculated, so should only be used as an approximation.
Additional Info
Julie Maestre
10 minutes
10 minutes
15 minutes
35 minutes
Dessert
American
12
120
Halloween Cookies, How to make Halloween cookies, Mummy Cookies
Like this recipe? Leave a comment below!
