Mastering Homemade Detroit-Style Pan Pizza: Fluffy, Crispy & Delicious
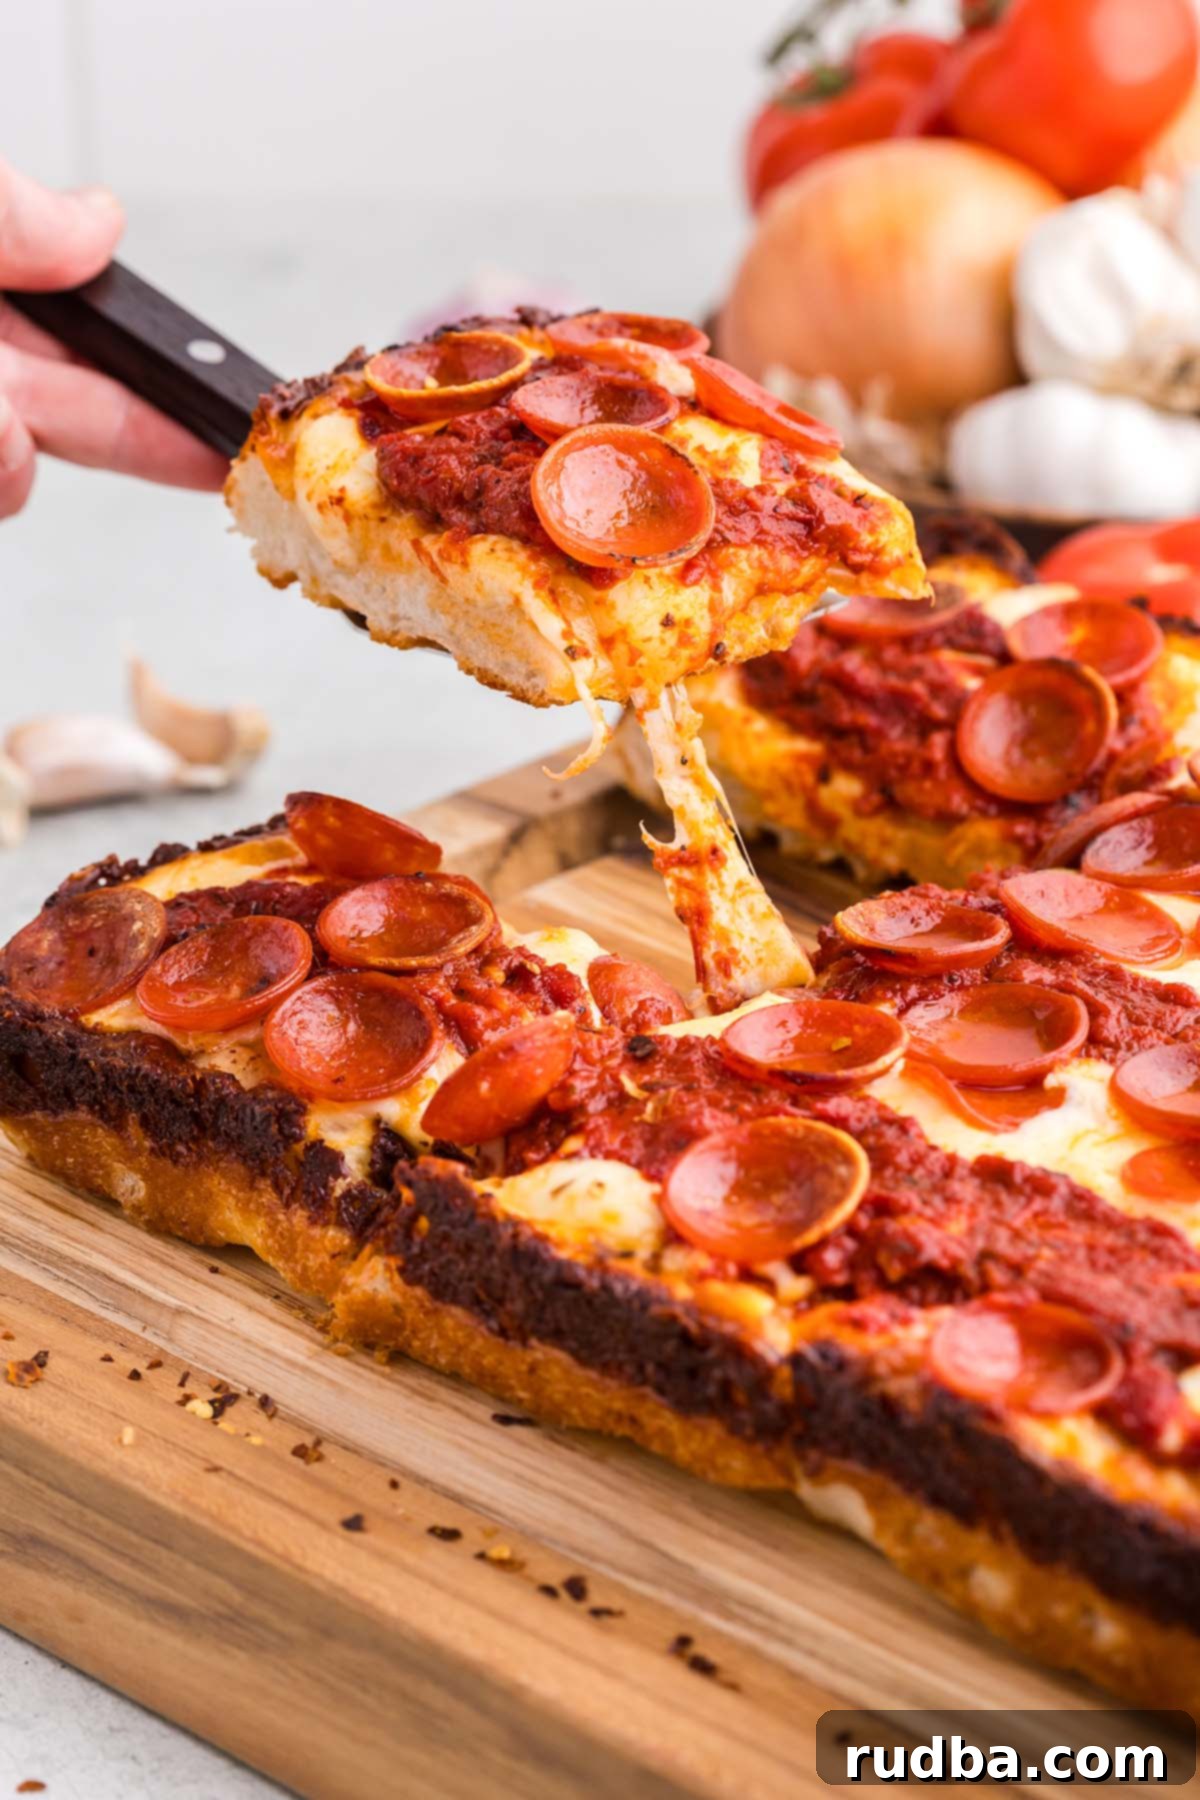
There’s a reason Detroit-style pan pizza has captured hearts across the nation: its unique combination of a wonderfully fluffy, yet undeniably crispy crust, generously loaded with rich sauce and a delightful blend of cheeses. This isn’t just any pizza; it’s a culinary experience defined by its signature rectangular shape, the deep-dish style bake, and perhaps most famously, the caramelized, crispy cheese crust that forms around its edges. As one of my absolute favorite pizza styles, I’m thrilled to share that you no longer need to travel to the Motor City to savor this iconic dish. Making authentic Detroit-style pizza at home is surprisingly simple, incredibly rewarding, and promises to deliver that perfect balance of texture and flavor.
Imagine serving up this golden-edged, saucy masterpiece alongside a fresh, crisp salad and some tangy buffalo wings for the ultimate complete meal! It’s perfect for family dinners, game nights, or simply when you’re craving something truly special. The best part? This easy-to-follow recipe eliminates the need for specialized equipment like a pizza stone or a dedicated pizza oven. All you need is a standard 9×13 baking dish (or a traditional Detroit pizza pan if you have one) and a handful of readily available ingredients to create a show-stopping pizza that will impress everyone with its deep, satisfying flavors and irresistible crunch.
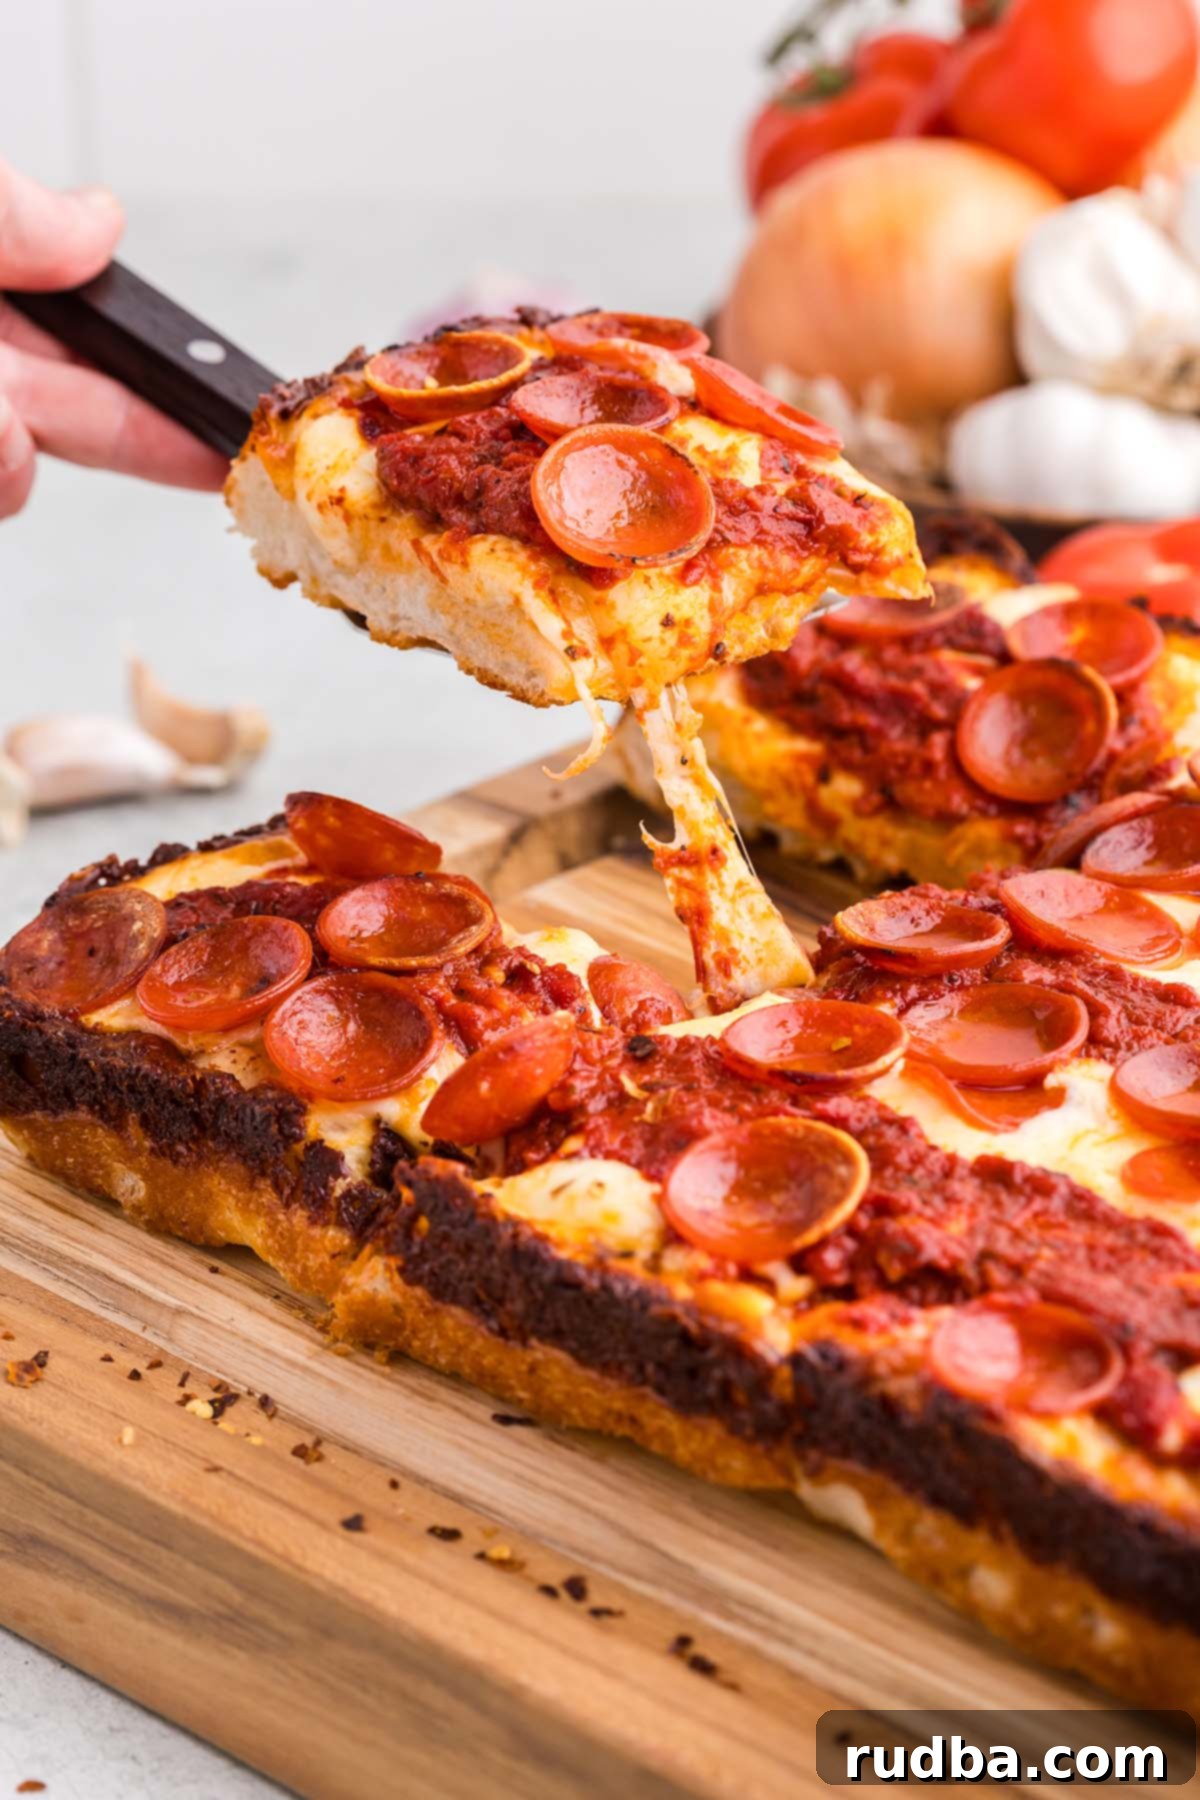
Table of Contents
- Ingredient Notes: Crafting the Perfect Detroit Pizza
- Top Tips for Detroit-Style Pizza Perfection
- What Other Toppings Can I Add to My Detroit Pizza?
- Storing Your Delicious Leftover Detroit Pizza
- Freezing Detroit-Style Pizza for Later Enjoyment
- Full Detroit Style Pan Pizza Recipe
Ingredient Notes: Crafting the Perfect Detroit Pizza
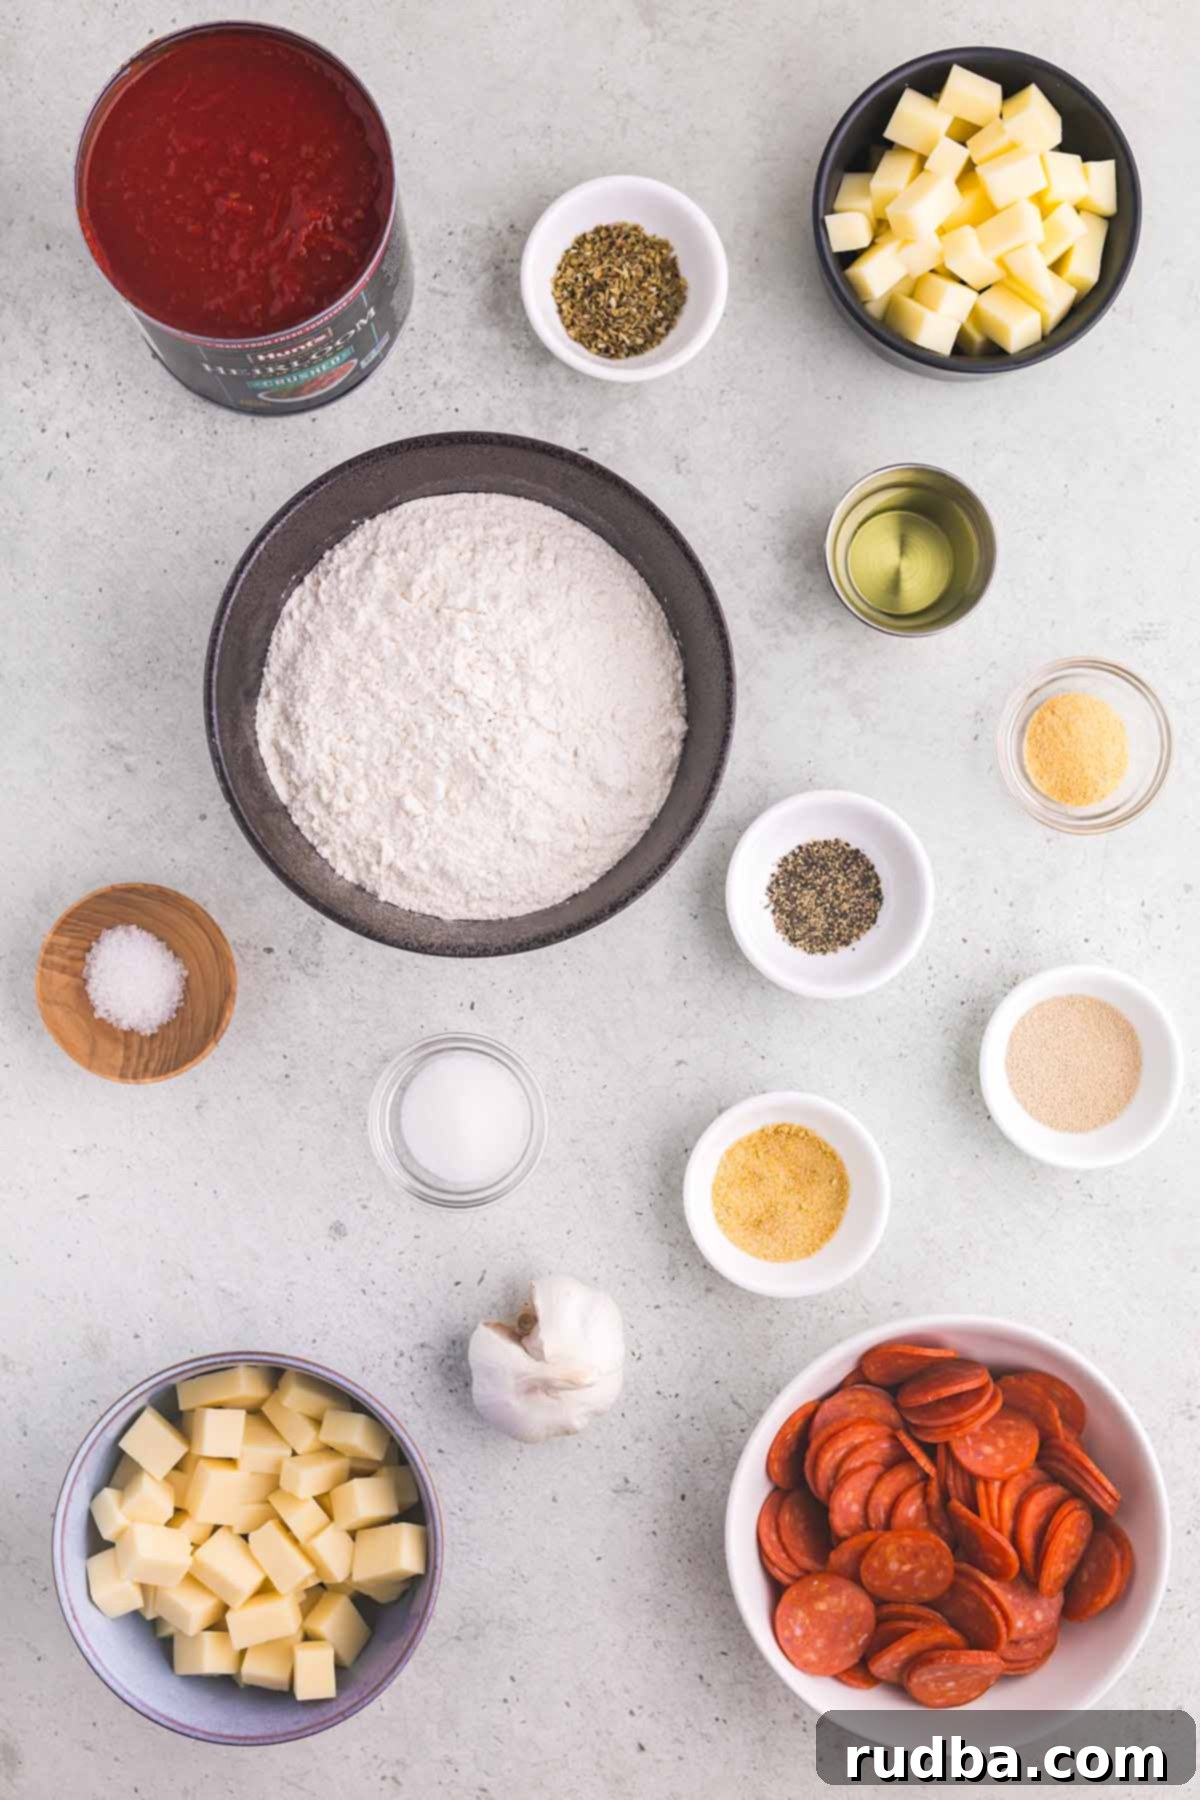
Achieving that signature Detroit-style taste and texture starts with selecting the right ingredients. Pay attention to these details for the best possible results. See the recipe card below for exact quantities and complete instructions.
- Flour – For an authentic, wonderfully chewy interior and a shatteringly crisp exterior, I enthusiastically recommend using bread flour. Its higher protein content leads to stronger gluten development, which is crucial for the unique structure of this dough. The robust gluten network traps gas, creating that desired fluffy yet resilient crumb. While you *can* substitute with all-purpose flour, and the pizza will still be good, bread flour truly elevates the texture to a superior level of crispiness and chewiness that sets Detroit-style apart from other pan pizzas.
- Sauce – The sauce for Detroit-style pizza is traditionally applied in distinctive “red stripes” on top of the cheese, a hallmark of its unique presentation that allows the cheese underneath to brown beautifully. Whether you opt for a high-quality store-bought pizza sauce for convenience or prefer to craft your own from scratch, both options work beautifully. For an intriguing twist and an added layer of richness, consider using a creamy vodka sauce, which adds a creamy depth of flavor that complements the robust crust and cheese marvelously.
- Cheese – The traditional cheese for Detroit-style pizza is Wisconsin Brick cheese, known for its superb melting properties and distinctive buttery, slightly tangy flavor that caramelizes perfectly along the pan edges to create the famous “frico” crust. However, authentic brick cheese can be quite challenging to find outside of certain regions. Don’t despair! A fantastic and widely available substitute is a blend of low-moisture mozzarella (for its classic stretch, melty texture, and mild flavor) and a sharper cheese like provolone (to add a more complex, savory depth). If provolone isn’t available, fontina is another excellent option that melts beautifully. The key is to use plenty of cheese, especially around the perimeter of the pan, to ensure that iconic crispy, caramelized edge.
Top Tips for Detroit-Style Pizza Perfection
- Reduce the Pizza Sauce for Optimal Crispness – This step is incredibly important for preventing a soggy pizza, a common pitfall in many homemade recipes. Pizza sauce, especially if homemade or from canned tomatoes, often contains a lot of inherent water. Reducing it on the stovetop by simmering not only concentrates the delicious tomato flavors but, more importantly, removes this excess moisture. A drier, thicker sauce prevents the dough from becoming wet and leads to a much crispier crust, which is fundamental to the unique texture of the Detroit style. As an alternative, for maximum crust integrity, you can opt to ladle the warm, reduced sauce over the pizza *after* it comes out of the oven, maintaining its rich color and flavor.
- Layer Cheese Directly on the Dough First – In a slight but crucial departure from many traditional pizza styles, authentic Detroit pizza places the cheese directly onto the dough as the first layer, *before* the sauce. This isn’t just for aesthetics or convenience; it’s a highly strategic move for texture. The initial layer of cheese acts as a protective barrier, preventing the dough from absorbing moisture from the sauce that will be added later. This foundation is crucial for achieving that characteristic crispy, almost fried, bottom crust. Furthermore, this method allows the cheese around the edges of the pan to melt, bubble, and begin to caramelize against the hot metal from the very start of the bake, contributing significantly to the signature “frico” crust.
- Generous Olive Oil and Edge Cheese for that “Frico” Crust – For that legendary crispy, buttery, caramelized crust – the glorious “frico” – you need to be truly generous. Before placing your dough, add a substantial amount (about 3 tablespoons) of olive oil to the bottom and ensure it coats the sides of your pan. This olive oil acts as a frying medium for the dough, creating that distinct fried bottom and promoting an even, golden-brown hue. Equally important is to pile extra cheese (especially the mozzarella and provolone blend) directly along the edges of the pan, touching the metal. As this cheese melts during baking, it will crisp up and turn a rich golden-brown, forming those irresistible, savory, crunchy borders that are the unmistakable hallmark of authentic Detroit-style pizza.
- Choosing the Right Baking Pan Makes All the Difference – The type of pan you use for your Detroit-style pizza significantly impacts the final crust texture and color. A sturdy 9×13 inch dark metal cake pan works wonderfully and is easily accessible. However, if you happen to own a traditional Detroit-style pizza pan, that’s even better! These specialized pans are typically made from darker materials, such as anodized aluminum or blue steel, which are known for their superior heat transfer capabilities. The darker the pan, the more efficiently it conducts heat directly to the dough, resulting in a distinctly crispier and darker bottom crust and more intensely caramelized, golden-brown edges. This direct, intense heat is key to developing the complex textures that define this beloved pizza style.
What Other Toppings Can I Add to My Detroit Pizza?
While the classic Detroit-style pizza is often adorned with those iconic “cup and char” pepperonis, creating savory pools of grease and crispy edges, the beauty of homemade pizza lies in its incredible versatility. Don’t limit yourself to tradition; let your culinary imagination run wild and explore a diverse range of toppings that can elevate your pan pizza experience!
Your tastebuds are the ultimate guide when it comes to pizza toppings, but here are some popular ideas that complement the rich crust and tangy sauce beautifully. Beyond pepperoni, consider adding a variety of options for texture and flavor. I personally adore extra cheese (because you can truly never have too much!), sweet and savory caramelized onions, robust Italian sausage (crumbled and pre-cooked), and a sprinkling of fresh basil for an aromatic, fresh finish. Other fantastic choices include thinly sliced mushrooms, colorful bell peppers, black olives, or even a spicy kick from pickled jalapeños. For more savory depth, crumbled cooked bacon or shredded chicken (perhaps BBQ chicken style) can make fantastic additions. Remember to distribute your toppings evenly and consider how they will cook within the deep-dish style, perhaps adding more delicate herbs or fresh ingredients like basil after baking. Feel free to mix and match to discover your perfect Detroit-style creation!
Storing Your Delicious Leftover Detroit Pizza
One of the great things about Detroit-style pizza is that it often reheats beautifully, making leftovers a real treat. To keep your pizza fresh and delicious, allow it to cool completely to room temperature before transferring individual slices to an airtight container. Stored properly in the refrigerator, your leftover pizza will maintain its quality and flavor for up to 4 days. Proper cooling is key to prevent sogginess and maintain texture.
When it comes to reheating, for the best possible experience, avoid the microwave if crispiness is your goal, as it tends to steam the crust and make it soggy. For truly spectacular results, an air fryer is highly recommended: reheat slices at 370°F (188°C) for about 4-6 minutes, or until the cheese is wonderfully melty and the crust has regained its satisfying crispness. Alternatively, you can achieve excellent results by reheating slices in a conventional oven or toaster oven at 370°F (188°C) for approximately 6-8 minutes, or until heated through and crispy. If you’re truly in a pinch and don’t mind a softer crust, a microwave will warm it up in about 45-60 seconds, but be prepared for a less ideal texture.
Freezing Detroit-Style Pizza for Later Enjoyment
Detroit-style pizza is an excellent candidate for freezing, allowing you to enjoy a quick, convenient, and delicious meal whenever a craving strikes without having to start from scratch. I typically prepare the pizza, bake it, let it cool completely, and then cut the pizza into individual squares before freezing. Lay the pizza squares flat on a parchment-lined baking sheet and place them uncovered in the freezer for a few hours, or until they are completely solid. This method, known as flash freezing, prevents the slices from sticking together once bagged.
Once frozen solid, transfer the individual pizza squares to a heavy-duty freezer bag or an airtight freezer-safe container, removing as much air as possible to prevent freezer burn. They can be stored in the freezer for up to three months without significant loss of quality or flavor. For best reheating results and to preserve that delicious texture, it’s advisable to let the frozen pieces thaw in the refrigerator for a few hours or overnight before reheating. You can then reheat them using the air fryer or oven methods mentioned above, adding a few extra minutes to account for the chilled temperature. This ensures more even heating and helps restore the ideal crispy and chewy texture.
I hope you thoroughly enjoy making and devouring this homemade Detroit-style pan pizza as much as I do! It’s truly a labor of love that yields incredibly satisfying results, a perfect blend of history, technique, and deliciousness right in your own kitchen.
Tried this recipe? Please leave a star ⭐️⭐️⭐️⭐️⭐️ rating in the recipe card below and/or a review in the comments section further down the page. Your feedback is greatly appreciated, helping other home cooks discover and perfect this amazing pizza! And consider following me on Facebook or Pinterest for more delicious recipes and culinary inspiration!

Detroit Style Pan Pizza
Julie Maestre
1 hour
15 minutes
1 hour
2 hours
15 minutes
12
Save Recipe
Saved Recipe
Pin Recipe
Rate Recipe
Print Recipe
Equipment
-
9×13 inch Dark Metal Baking Pan or Detroit Pizza Pan
-
Stand Mixer with Dough Hook (optional, hand mixing works well too)
-
Medium/Large Saucepan
Ingredients
Pizza Dough
-
2 ¼
cups
bread flour (highly recommended for superior texture and crispness) -
1 ½
teaspoons
instant yeast -
1
teaspoon
kosher salt -
1
cup
warm water,
not hotter than 115°F (46°C) to ensure yeast activity -
Olive oil (generously for greasing the pan and bowl, essential for the crispy bottom)
Pizza Sauce
-
1
tablespoon
olive oil -
3
cloves
garlic,
finely minced, for aromatic depth -
2
teaspoons
Italian Seasoning (for classic pizza flavor profile) -
28
oz
can crushed tomatoes,
crushed tomatoes provide the best texture for this sauce, but whole tomatoes pureed work in a pinch. -
1
teaspoon
garlic powder -
1
teaspoon
onion powder -
¼
teaspoon
sugar,
or to taste, to balance the acidity of the tomatoes -
Salt and pepper to taste
Pizza Toppings
-
7
oz
Cup and char pepperoni,
divided for optimal layering and crispness -
10
oz
mozzarella cheese (preferably low-moisture whole milk, cut into ½-inch cubes for best melt and frico) -
3
oz
provolone (cut into ½-inch cubes, for added savory depth, or substitute with fontina) -
Fresh basil and red pepper flakes (optional, for vibrant garnish and a touch of heat)
Prevent your screen from going dark
Instructions
How to Make the Dough:
-
In the large mixing bowl of a stand mixer (or a large bowl if mixing by hand), add the bread flour, instant yeast, and kosher salt. Use a spoon to gently mix these dry ingredients until well combined. Gradually pour in the warm water, continuing to mix with the spoon until a shaggy, somewhat sticky dough forms (this should take about 30 seconds of initial mixing). If using a stand mixer, attach the dough hook and mix on medium speed (e.g., KitchenAid level 4) for 5 minutes. You will observe the dough transforming into a smooth, elastic, and moist consistency. Lightly grease a clean, separate bowl with olive oil. Using water-moistened hands (as the dough will be quite sticky), carefully transfer the dough into this greased bowl, turning it once to coat.
-
Cover the bowl securely with plastic wrap or a clean kitchen towel. Place the dough in a warm spot to rise for approximately 30 minutes, or until it has visibly doubled in size. The exact rising time can vary depending on the warmth of your environment, so be patient and let the dough guide you. If your kitchen is cooler, it may take a bit longer than 30 minutes.
-
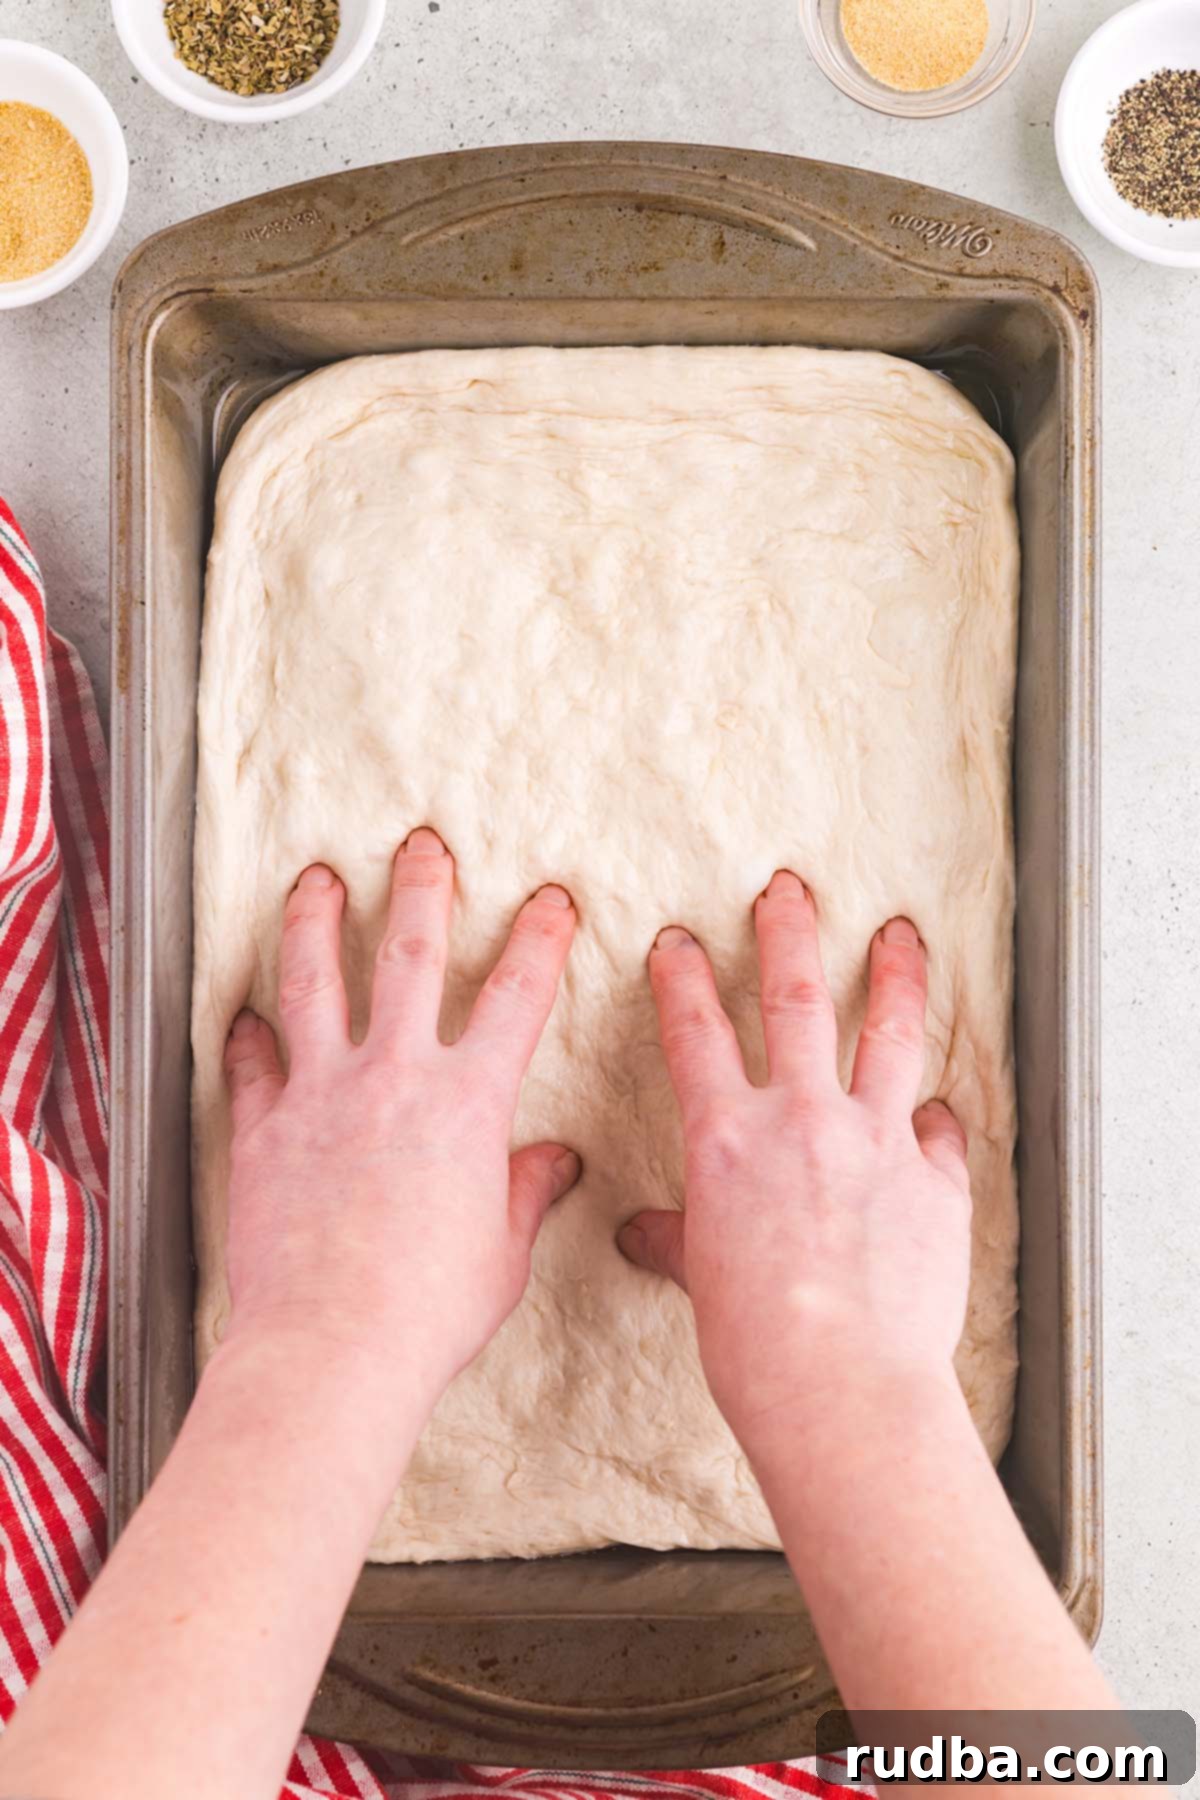
Once the dough has completed its first rise and doubled in size, prepare your baking pan. Generously add about 3 tablespoons of olive oil to the bottom of your dark 9×13 inch metal cake pan or specialized Detroit pizza pan. Ensure the oil evenly coats the entire bottom surface and extends slightly up the sides of the pan. This generous oiling is essential for achieving the signature fried, crispy bottom crust.
-
Carefully transfer the risen dough into the center of the oiled pan. Use your fingertips to gently dimple the dough and begin stretching it outwards towards the edges of the pan. It’s important to be gentle; do not force or tear the dough. It’s completely normal if the dough doesn’t reach the edges on this first stretch. Cover the pan loosely with plastic wrap and set it aside to rest for about 15 minutes. This crucial resting period allows the gluten strands to relax, making the dough more pliable and easier to stretch further.
-
After the 15-minute rest, return to the dough and gently stretch it again, aiming to fully extend it to all the edges of the pan. For most doughs, one 15-minute rest is sufficient. However, if your dough still resists stretching to the edges, simply cover it again and let it rest for another 15 minutes before attempting a final stretch. Once the dough completely fills the pan, cover it again with plastic wrap and set it aside for its final short proof, which will occur while you prepare the pizza sauce.
How to Make the Sauce:
-
Heat a medium to large saucepan over medium-high heat on your stovetop. Once the pan is hot, add the olive oil, followed by the finely minced fresh garlic and Italian seasoning. Sauté these aromatics for approximately 30 seconds, stirring continuously, until the garlic becomes fragrant and the seasonings release their inviting aroma. Be careful not to burn the garlic.
-
Stir in the crushed tomatoes, sugar (which helps to balance the acidity), garlic powder, and onion powder. Mix all ingredients thoroughly to combine. Bring the sauce mixture to a gentle simmer. Allow the sauce to simmer uncovered for about 15 minutes with occasional stirring. This simmering process is absolutely crucial for reducing the water content of the sauce, which prevents a soggy crust, and also concentrates the rich tomato flavors. While the sauce is reducing, preheat your oven to a high temperature of 500°F (260°C) and make sure the oven rack is placed at the lowest possible level. If you have a pizza stone, place it on the bottom rack as well to aid in even heat distribution and a crispier bottom crust.
Assembling the Pizza (use ½ the sauce made in this recipe)
-
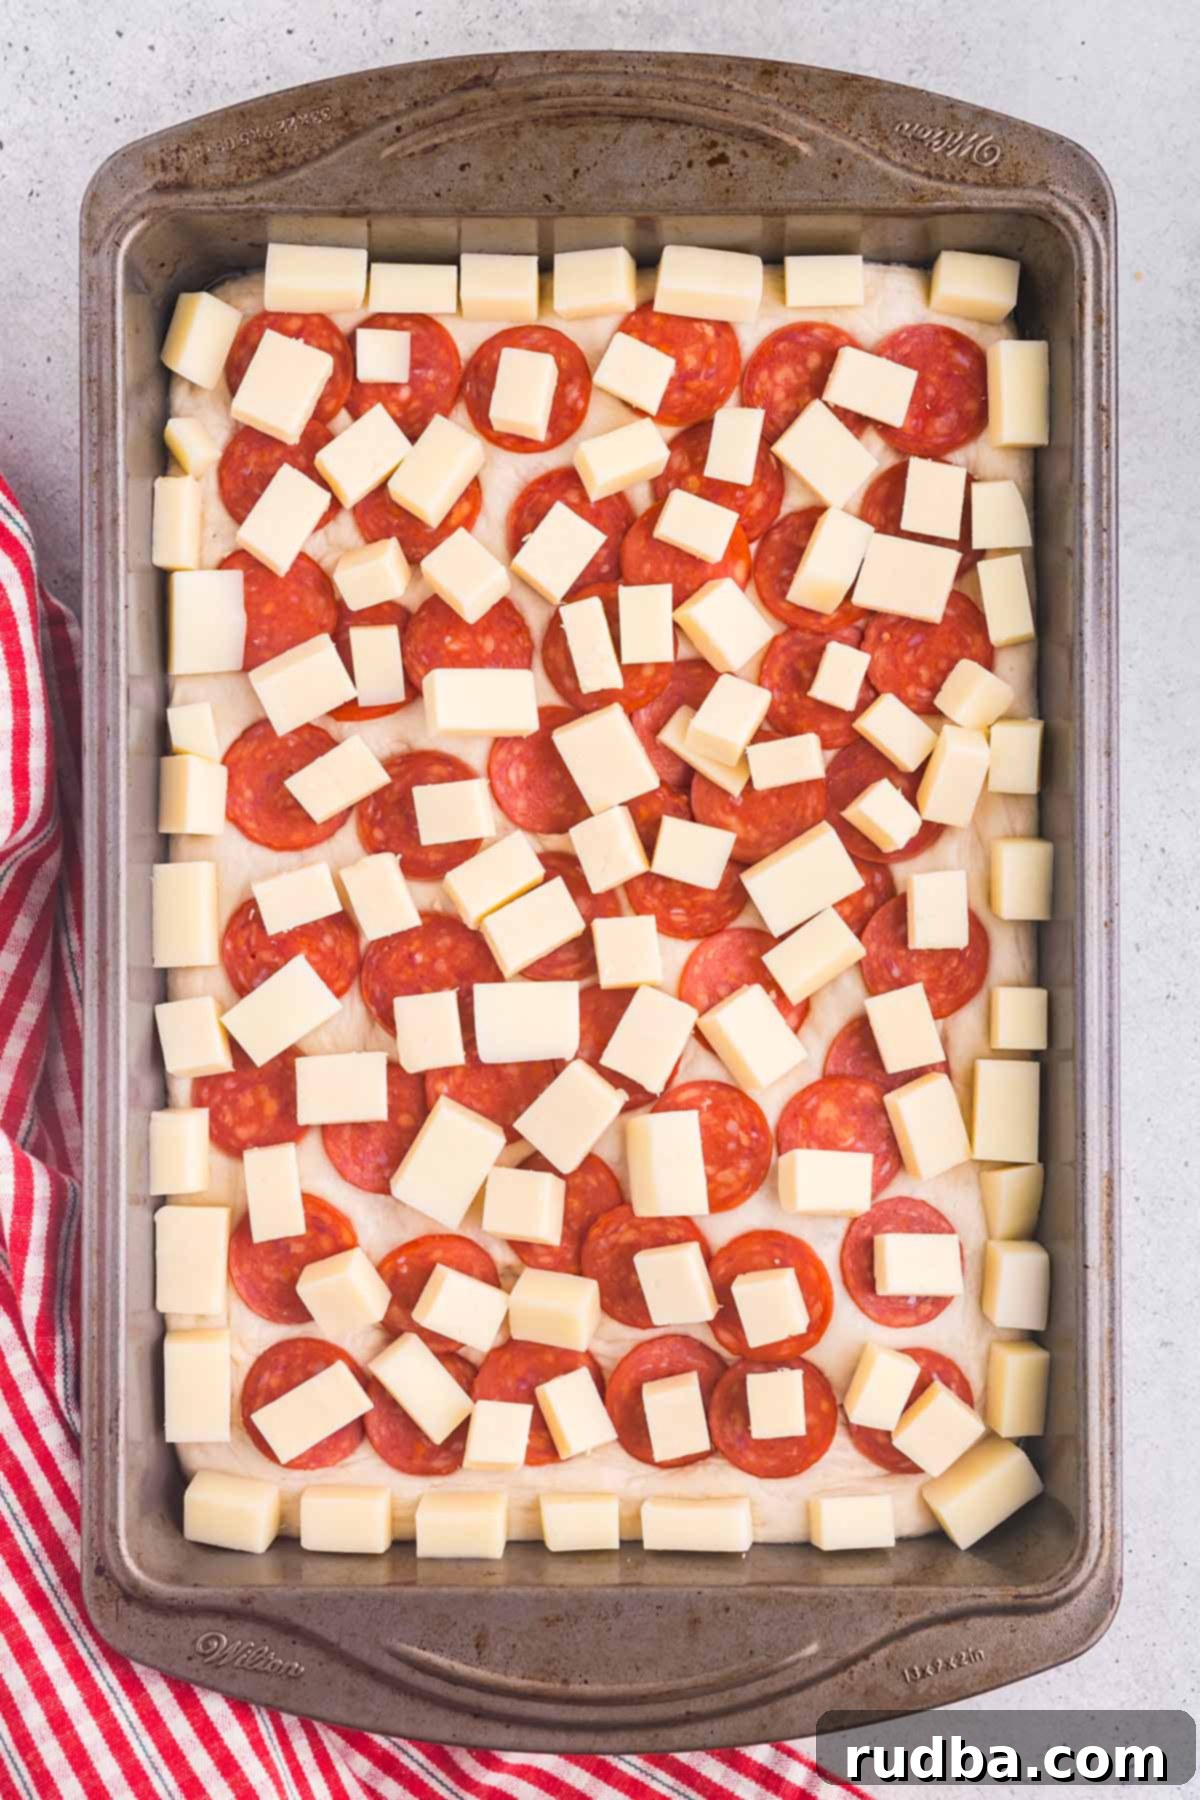
Begin by adding a generous portion of your cheese cubes (both mozzarella and provolone) around the perimeter of the dough, ensuring they are touching the edges of the pan. This is the absolute key to forming that irresistible crispy, caramelized cheese crust, or “frico.”
-
Next, evenly distribute about half of the “cup and char” pepperoni slices directly over the dough, on top of the initial layer of cheese. This first layer of pepperoni will get nice and crispy underneath the rest of the toppings.
-
Now, add the remaining cheese cubes, dispersing them evenly across the entire pizza surface. This ensures every bite is loaded with delicious, melty cheese.
-
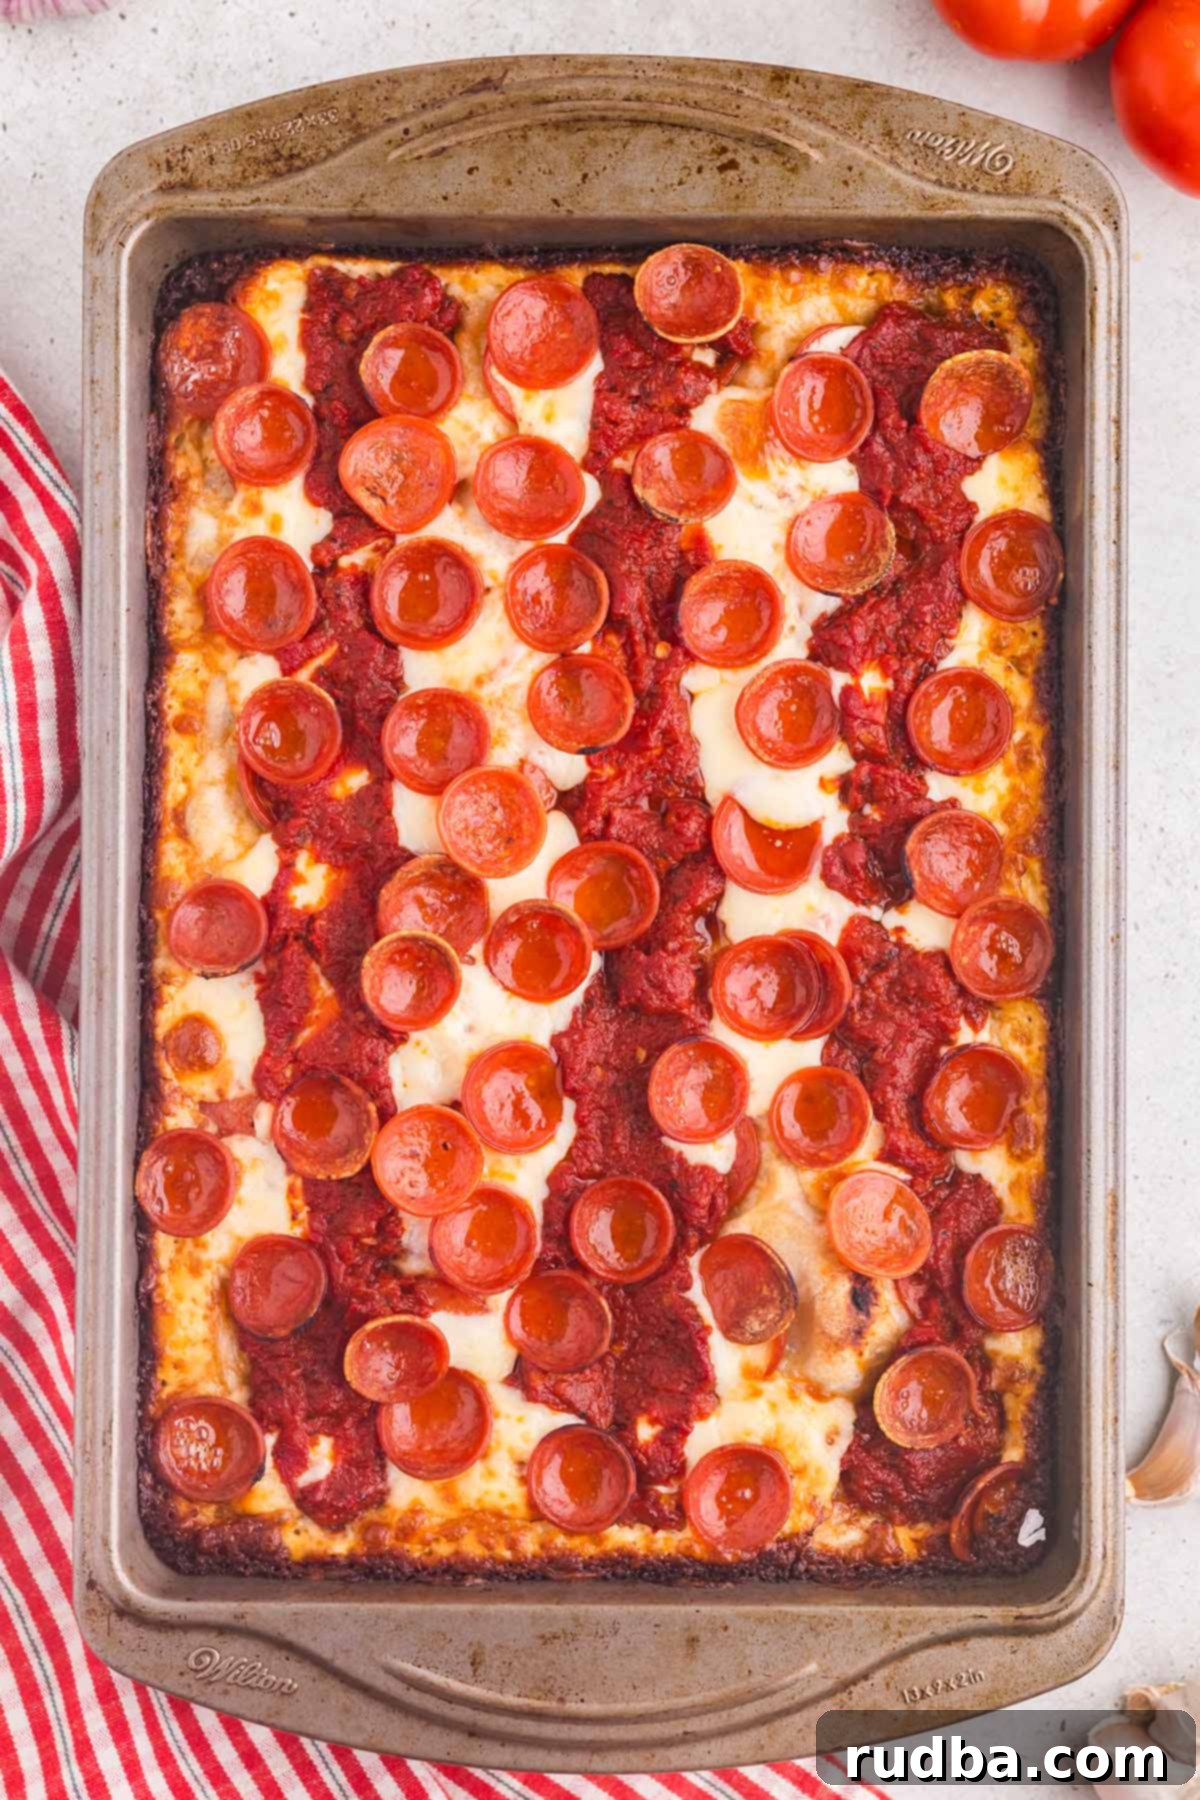
Using a large spoon, artfully spread the reduced pizza sauce in three evenly spaced stripes along the length of the pizza. One stripe should run down the middle, with another on each side. This classic Detroit-style presentation allows the cheese underneath to get beautifully browned and crispy, rather than being covered by sauce.
-
Finally, scatter the rest of your pepperoni over the sauce stripes and visible cheese. These top-layer pepperonis will crisp up and cup beautifully in the hot oven, capturing little pools of flavorful grease.
-
Carefully place the assembled pan pizza onto the lowest rack in your preheated 500°F (260°C) oven. Bake for 12-15 minutes. You’ll know it’s perfectly ready when the edges are dark golden-brown and crispy (the magnificent frico!), the cheese in the middle is bubbly, perfectly melty, and golden in spots, and the pepperoni slices have delightfully cupped.
-
Remove the pan pizza from the oven. Allow it to rest for a crucial minute or two before carefully sliding it out of the pan and onto a cutting board. This brief rest helps the cheese set properly and prevents toppings from sliding off when cut. Slice into squares with a sturdy pizza cutter or sharp knife and serve immediately, garnished with fresh basil or red pepper flakes if desired.
Notes
- Sauce Moisture: Reducing your pizza sauce before assembly is crucial to eliminate excess water content. A wet sauce can lead to a soggy crust, compromising the crispy foundation of your Detroit-style pizza. If you prefer, you can also ladle the sauce over the baked pizza just after it comes out of the oven.
- Cheese First Layer: Always add a layer of cheese directly onto the dough before the sauce. This creates a protective barrier, preventing the dough from absorbing moisture and ensuring a crispier, more defined crust. It’s a key technique for the authentic Detroit experience.
- Crispy Edges (Frico): Don’t be shy with olive oil and cheese around the pan’s perimeter! Generously oiling the pan and piling extra cheese along the edges allows it to melt, bubble, and caramelize, creating the distinct crispy, buttery “frico” crust that is a hallmark of Detroit-style pizza.
- Optimal Pan Choice: For the best results, use a dark 9×13 metal cake pan or a specialized Detroit pizza pan. Darker pans promote superior heat transfer, which is essential for achieving the perfectly dark, crispy bottom and caramelized edges that define this pizza style.
Nutrition
Calories:
210
kcal
|
Carbohydrates:
24
g
|
Protein:
12
g
|
Fat:
8
g
|
Saturated Fat:
4
g
|
Polyunsaturated Fat:
0.5
g
|
Monounsaturated Fat:
2
g
|
Cholesterol:
24
mg
|
Sodium:
483
mg
|
Potassium:
271
mg
|
Fiber:
2
g
|
Sugar:
3
g
|
Vitamin A:
370
IU
|
Vitamin C:
6
mg
|
Calcium:
208
mg
|
Iron:
1
mg
Nutrition information is automatically calculated, so should only be used as an approximation.
Additional Info
Julie Maestre
1 hour
15 minutes
1 hour
2 hours
15 minutes
Entree
American
12
210
Detroit Pizza, Pan Pizza, Homemade Pizza, Crispy Crust Pizza, Deep Dish Pizza, Detroit Style Pizza Recipe
Like this recipe? Leave a comment below!
