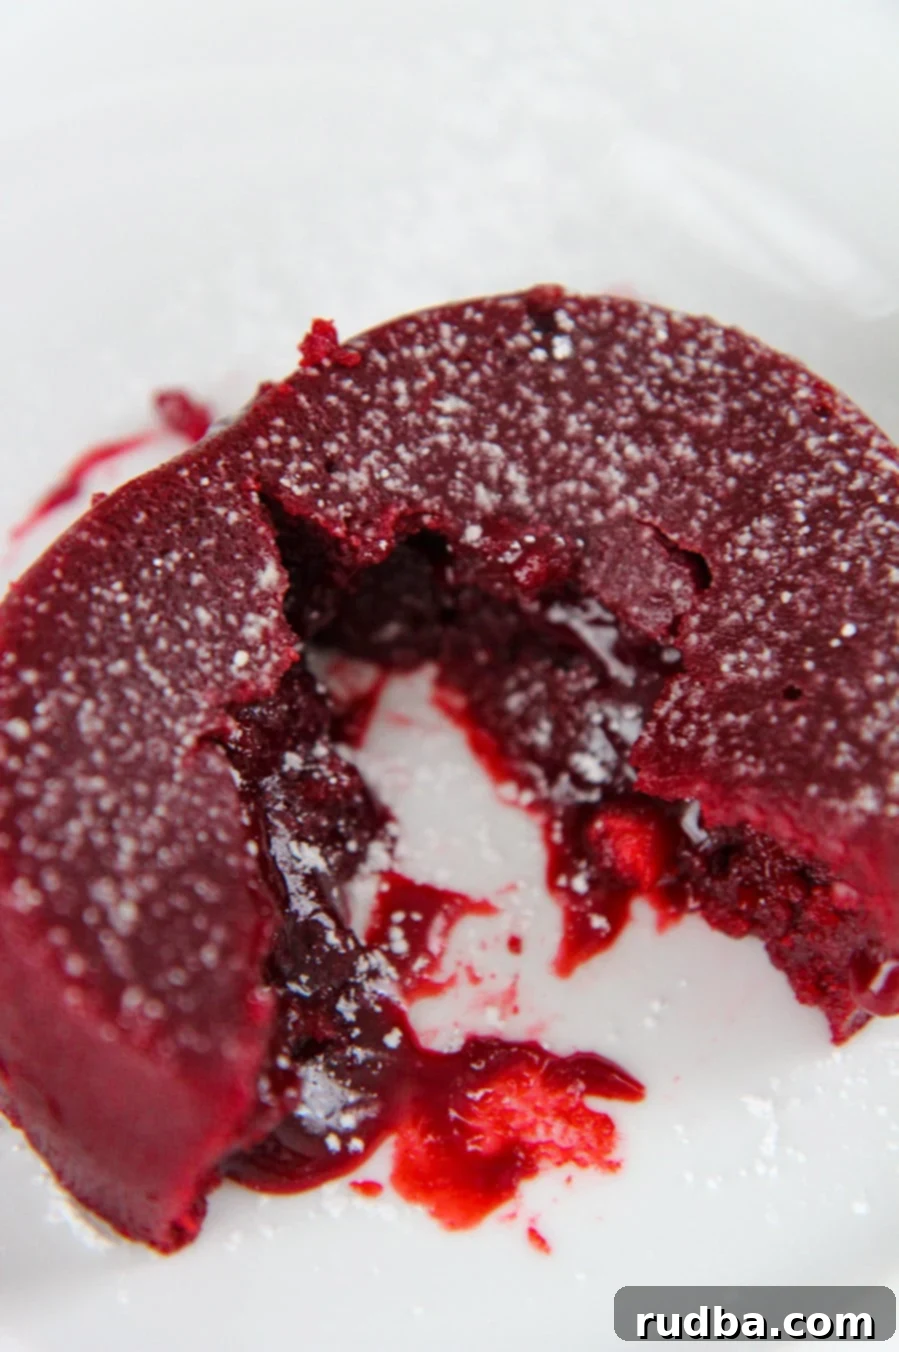
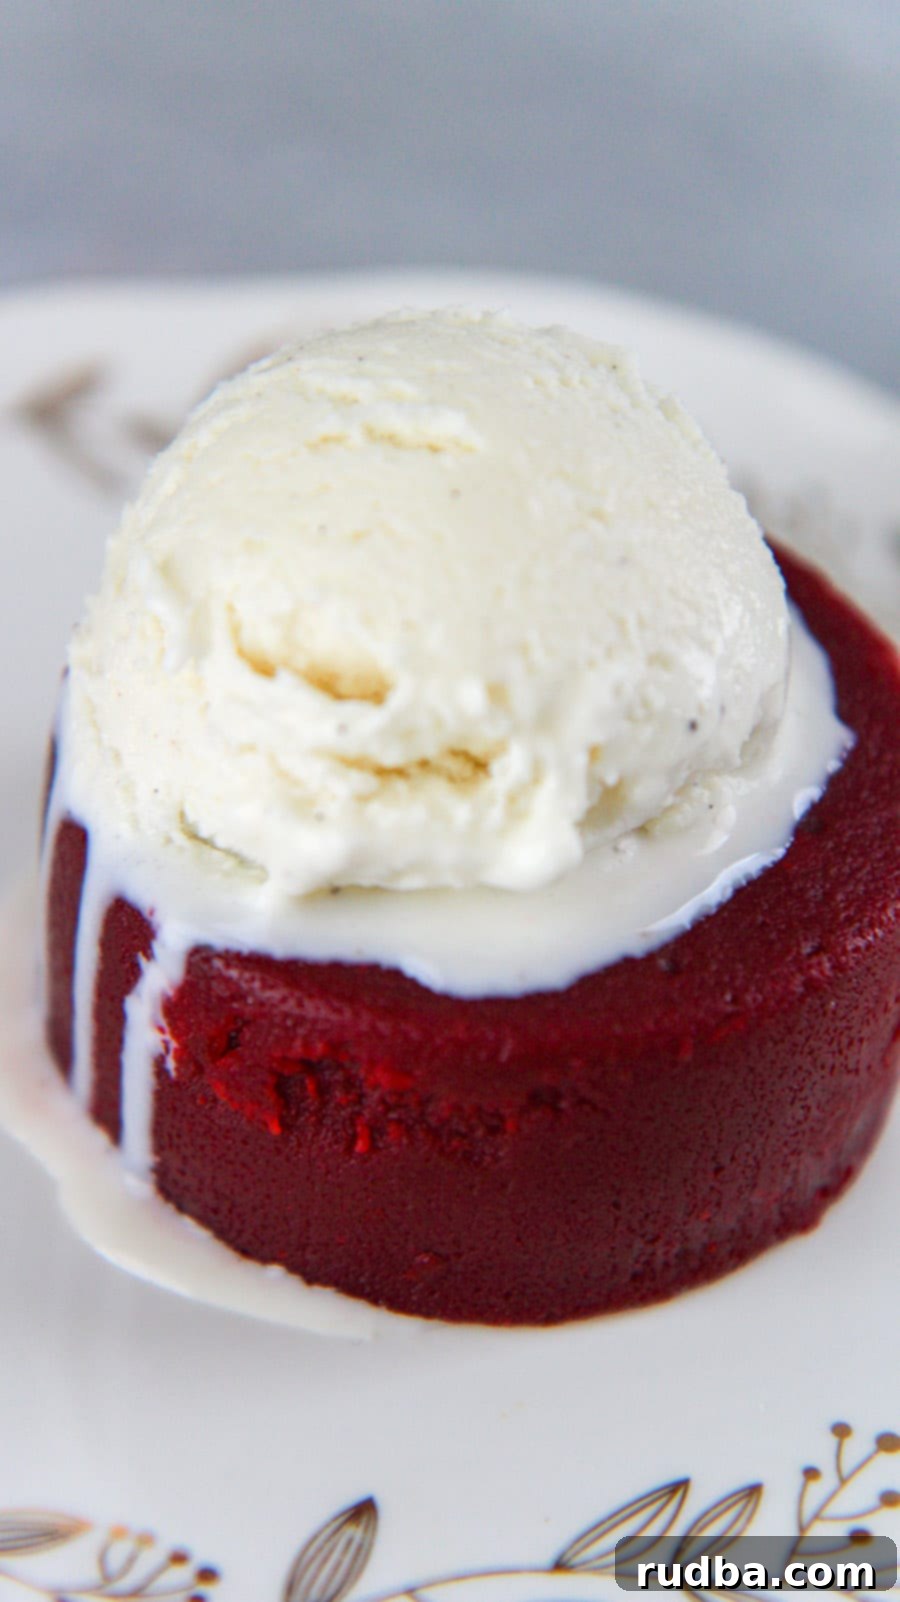
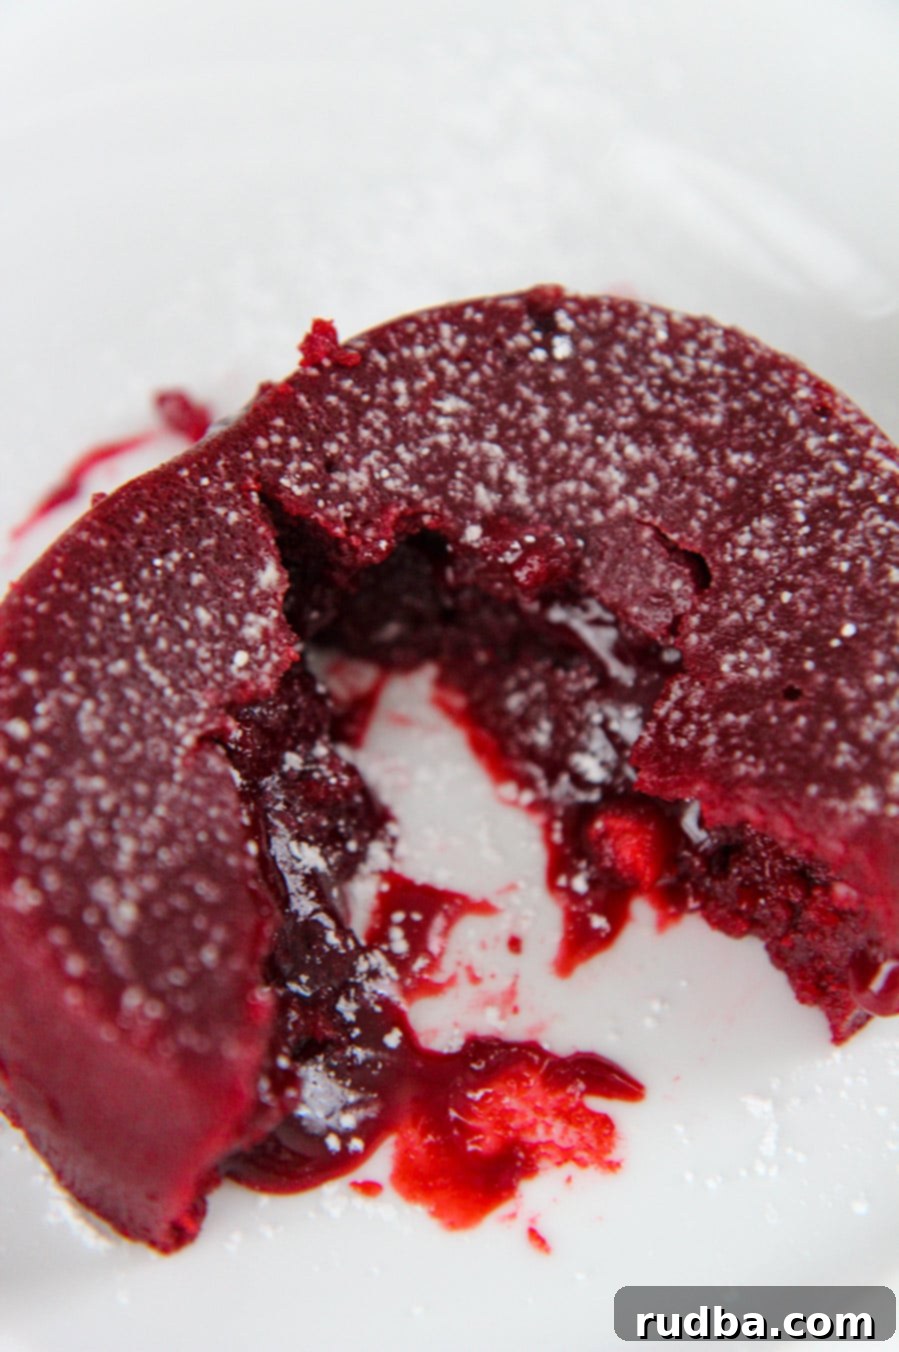
Prepare to be captivated by this stunning and utterly delicious Instant Pot Red Velvet Lava Cake! Pressure cooked to perfection in just 9 minutes, this dessert features a rich, moist red velvet exterior and a decadent molten chocolate center, making it an irresistible treat. Served warm with a generous scoop of creamy vanilla ice cream, it’s the ultimate showstopper for Valentine’s Day, a romantic date night, or any occasion that calls for a truly special dessert. Forget complicated baking – your Instant Pot makes creating this elegant and impressive cake surprisingly simple and fast!

Decadent Instant Pot Red Velvet Lava Cake: A Quick & Easy Dessert for Any Occasion
The molten chocolate cake, often known as lava cake, is a dessert that consistently tops the menu for a reason. That magical moment when your spoon breaks through the tender cake to reveal a warm, gooey, flowing chocolate center is pure bliss. While a classic chocolate lava cake is undeniably popular, taking a delightful twist with a vibrant red velvet version elevates this classic to new heights. I decided to bring this indulgent treat into the realm of the Instant Pot, and the results were nothing short of spectacular. Not only is this Instant Pot Red Velvet Lava Cake incredibly pretty with its rich crimson hue, but it’s also unbelievably delicious and surprisingly easy to whip up, even for novice bakers.
Traditionally, lava cakes require precise oven timing and can be a bit intimidating, but the Instant Pot simplifies the process dramatically. By utilizing the magic of pressure cooking, we achieve a perfectly cooked cake with that signature molten core every single time, without heating up your entire kitchen. This recipe is designed for ease and maximum flavor, ensuring you get that restaurant-quality dessert right in your home kitchen. Prepare to impress your loved ones (or just treat yourself!) with this stunning Red Velvet Lava Cake, made effortless with your Instant Pot.
Why Choose the Instant Pot for Your Red Velvet Lava Cake?
If you’re already an Instant Pot enthusiast, you know the unparalleled convenience it offers. For this Red Velvet Lava Cake, the Instant Pot truly shines. Here’s why it’s the perfect tool for achieving lava cake perfection:
- Speed & Efficiency: Forget preheating your oven and waiting for long baking times. Your Instant Pot comes to pressure and cooks these individual cakes in a mere 9 minutes! This makes it an ideal dessert for last-minute cravings or spontaneous date nights.
- Consistent Results: The sealed, pressurized environment of the Instant Pot ensures even heat distribution, leading to perfectly cooked cakes with that desirable molten center every single time. It’s less prone to the inconsistencies you might find with oven baking.
- Hands-Off Cooking: Once you’ve loaded your ramekins and set the timer, you’re free to prepare other parts of your meal or simply relax. No need to constantly check on the oven.
- No Oven Required: Perfect for hot summer days when you don’t want to turn on your oven, or if your oven is already occupied with other dishes.
- Moisture Retention: Pressure cooking helps keep the cakes incredibly moist and tender, enhancing the overall texture and flavor of the red velvet.
The Instant Pot transforms a potentially fussy dessert into an accessible and reliable recipe, making it easier than ever to enjoy a gourmet treat at home.
The Irresistible Allure of Red Velvet Lava Cake
Red Velvet is more than just a flavor; it’s an experience. The vibrant, deep red color immediately signals something special and luxurious. When combined with the dramatic molten center of a lava cake, it creates a truly show-stopping dessert that’s perfect for celebrations and romantic gestures alike. Here’s what makes this Red Velvet Lava Cake so captivating:
- Visual Spectacle: The stunning contrast of the rich red cake against the creamy vanilla ice cream, and the eventual reveal of the warm, dark chocolate lava, makes for an incredibly appealing presentation. It’s a dessert that photographs beautifully and delights the eye before the first bite.
- Balanced Flavor Profile: Red velvet is famous for its subtle cocoa flavor with a hint of tang, often from buttermilk, which perfectly balances the sweetness. In this lava cake, that distinct red velvet taste marries wonderfully with the gooey semi-sweet chocolate, creating a complex yet harmonious indulgence.
- Luxurious Texture: The cake itself is incredibly moist and tender, providing a soft embrace for the star of the show – the warm, flowing chocolate ganache-like center. Each spoonful offers a delightful mix of textures.
- Perfect for Special Moments: Whether it’s a romantic Valentine’s Day dinner, an anniversary celebration, a birthday treat, or just a cozy evening with a loved one, the Red Velvet Lava Cake adds a touch of elegance and festivity to any occasion.
Embrace the charm and decadence of this red velvet variation, offering a delightful twist on a beloved dessert classic.
Essential Ingredients for Your Instant Pot Red Velvet Lava Cake
Crafting the perfect Instant Pot Red Velvet Lava Cake begins with a handful of quality ingredients. Here’s what you’ll need, along with a few tips for each:
- Unsalted Butter (8 tbsp / 1 stick): The foundation for richness and moisture. Using unsalted butter allows you to control the salt content in the recipe. Good quality butter will always enhance the flavor.
- White Chocolate Chips (1/2 cup): These add an extra layer of sweetness and a smoother texture to the molten center. They also help lighten the chocolate flavor a bit, allowing the red velvet to shine.
- Semi-Sweet Chocolate Chips (1/2 cup): Crucial for the classic lava effect and deep chocolate flavor. If you’re not a fan of white chocolate or prefer a more intense chocolate experience, you can use a full cup of semi-sweet chocolate chips and omit the white chocolate entirely.
- Eggs (3, room temperature): Room temperature eggs incorporate more easily and create a smoother, more emulsified batter. They provide structure and richness to the cake.
- Vanilla Extract (1 tsp): A staple in most desserts, vanilla enhances the chocolate and red velvet flavors, adding warmth and depth. Use pure vanilla extract for the best taste.
- Red Food Coloring (1 tbsp): Essential for that iconic red velvet hue. Gel food coloring often provides a more intense color with less liquid compared to liquid food coloring, but either will work. Adjust amount to achieve desired shade.
- Salt (1/4 tsp): A pinch of salt is vital for balancing the sweetness and intensifying the chocolate flavors, preventing the cake from tasting bland.
- All-Purpose Flour (1/4 cup): Provides just enough structure to the cake without making it dense. The key is not to overmix the flour.
- Powdered Sugar (1 cup): Sweetens the cake and contributes to its tender texture. It dissolves easily into the batter.
- Water (1 cup, for Instant Pot): This water goes into the Instant Pot itself, not the cake batter. It’s necessary for the Instant Pot to build pressure and steam cook the cakes.
Essential Equipment for Instant Pot Red Velvet Lava Cake
Having the right tools will make your lava cake creation smooth and enjoyable:
- Instant Pot: Any model will work, but an 8-quart Instant Pot was used for this recipe. Ensure it’s clean and ready for use.
- 6-ounce Ramekins (4-6): These individual ceramic dishes are perfect for single-serving lava cakes. Their size ensures even cooking and a beautiful presentation.
- Microwave-Safe Bowl: For safely melting your butter and chocolate.
- Whisk or Spatula: For mixing your batter smoothly.
- Instant Pot Trivet: Most Instant Pots come with a trivet, which keeps the ramekins elevated above the water.
- Oven Mitts or Tongs: Essential for safely removing the hot ramekins from the Instant Pot after cooking.
- Measuring Cups and Spoons: For accurate ingredient measurements.

Top Tips for the Perfect Instant Pot Red Velvet Lava Cake
Achieving molten perfection is easier than you think with these expert tips:
- Prepare Your Ramekins Properly: Use 6-ounce ramekins and generously butter or spray them with baking/cooking spray. This crucial step ensures your lava cakes release easily without sticking, preserving their beautiful shape.
- Choose Good Quality Chocolate: The type of chocolate you use significantly impacts the flavor of your lava cake. Opt for good quality white and semi-sweet chocolate chips (or bars, chopped) for the best taste and melt.
- Master the Chocolate Melting: When melting the butter and chocolate, microwave in short 20-second intervals, stirring thoroughly after each interval. This prevents the chocolate from burning or seizing. It should take about 2 minutes total. Don’t worry if the white chocolate doesn’t melt completely smooth; a few small chunks are fine.
- Add Eggs One at a Time: Incorporating the eggs one at a time ensures they are fully emulsified into the batter, leading to a smoother texture and preventing curdling.
- Do Not Overmix: Once you add the flour, mix just until combined. Overmixing can develop the gluten in the flour, resulting in a tougher cake rather than a tender one.
- Serve Warm and Promptly: The magic of lava cake is in its molten center, which is best enjoyed warm. Serve immediately after removing from the ramekins with a dusting of powdered sugar or a scoop of vanilla ice cream. The contrast of hot and cold is divine!
- Handle Hot Ramekins with Care: Be extremely cautious when removing the ramekins from the Instant Pot. They will be super hot! Use sturdy oven mitts or tongs to prevent burns.
- Precise Cooking Time & Quick Release: Cook the lava cakes for exactly 9 minutes under pressure. Once the cooking cycle is complete, perform a quick release of pressure immediately. This specific timing and release method are key to achieving that perfect molten center.
- Don’t Fill Ramekins to the Brim: Fill the ramekins almost to the top, but leave a tiny bit of space. These cakes don’t rise significantly like traditional cakes, so filling them mostly full is ideal for a good portion size.
Variations and Customizations for Your Lava Cake
While the Red Velvet Lava Cake is spectacular on its own, don’t hesitate to get creative with variations:
- Chocolate Intensity: For a darker, more intense chocolate flavor, use all semi-sweet or even dark chocolate chips, omitting the white chocolate.
- Flavor Infusions: Add a splash of almond extract, peppermint extract (for a holiday twist), or even a teaspoon of espresso powder to deepen the chocolate notes. A dash of orange zest can also be lovely.
- Boozy Bliss: For an adult treat, add a tablespoon of your favorite liqueur to the batter, such as Kahlúa, Grand Marnier, or a raspberry liqueur.
- Topping Extravaganza: Beyond vanilla ice cream, consider fresh berries (strawberries or raspberries pair beautifully with red velvet), a dollop of whipped cream, a drizzle of chocolate sauce, or even a sprinkle of mini chocolate chips or cocoa nibs.
- Cream Cheese Frosting Drizzle: For an authentic red velvet experience, whip up a quick cream cheese frosting and drizzle it over the warm cakes.
Troubleshooting Common Instant Pot Lava Cake Issues
Even with a simple recipe, minor hiccups can occur. Here’s how to troubleshoot common issues:
- Cake Not Molten Enough: If your cake isn’t molten in the center, it was likely overcooked. Ensure your Instant Pot is calibrated correctly and try reducing the pressure cooking time by 1 minute next time. Factors like ramekin size and actual Instant Pot pressure can vary slightly.
- Cake Too Runny: If the cake is too runny throughout, it might be undercooked. Add 1-2 minutes to the pressure cooking time. Also, ensure your ingredients were accurately measured, especially the flour.
- Cake Sticking to Ramekins: This is almost always due to insufficient buttering or spraying of the ramekins. Be very generous with your grease!
- Lack of Red Color: If your cake isn’t vibrantly red, you may need to add a bit more red food coloring. Gel food coloring often provides a stronger pigment than liquid.
Storage and Reheating
While Instant Pot Red Velvet Lava Cakes are best enjoyed immediately for that perfect molten center, you can store leftovers (if there are any!).
- Storage: Allow any leftover cakes to cool completely. Store them individually wrapped in plastic wrap or in an airtight container in the refrigerator for up to 2-3 days.
- Reheating: To reheat, remove the cake from the ramekin (if it’s still in it) and microwave on a microwave-safe plate for 20-30 seconds, or until just warmed through and the center is soft. Be careful not to overheat, or you’ll lose the molten effect.

Instant Pot Red Velvet Lava Cake
Save RecipeSaved Recipe
Pin Recipe
Rate Recipe
Print Recipe
Equipment
-
Instant Pot (8 Qt recommended)
-
6-ounce Ramekins (4-6)
-
Microwave-safe Bowl
-
Whisk or Spatula
-
Instant Pot Trivet
-
Oven Mitts or Tongs
Ingredients
- 8 tbsp unsalted butter, 1 stick
- 1/2 cup white chocolate chips
- 1/2 cup semi-sweet chocolate chips
- 1 cup powdered sugar
- 1/4 cup all-purpose flour
- 1/4 tsp salt
- 1 tsp vanilla extract
- 1 tbsp red food coloring
- 3 large eggs (room temperature)
- 1 cup water , for the Instant Pot, does not go into the cake batter
Instructions
-
Prepare Ramekins: Generously butter the inside of each 6-ounce ramekin or spray thoroughly with baking/cooking spray. This ensures the cakes release perfectly.
-
Melt Butter and Chocolate: Cut the unsalted butter into smaller slices and place them in a large microwave-safe bowl. Add both the white chocolate chips and semi-sweet chocolate chips to the bowl. Microwave in 20-second intervals, stirring well after each interval, until the chocolate is mostly melted and smooth. This process usually takes about 2 minutes total. The white chocolate may retain a few small lumps, which is perfectly fine.
-
Incorporate Sugar: Add the powdered sugar to the warm, melted butter-chocolate mixture. Whisk vigorously until the sugar is fully incorporated and the mixture is smooth.
-
Add Wet Ingredients & Flavor: Add the eggs one at a time to the chocolate mixture, mixing well after each addition until fully combined. Next, stir in the vanilla extract, all-purpose flour, salt, and red food coloring. Mix just until the batter is smooth and uniformly red, being careful not to overmix once the flour is added.
-
Fill Ramekins: Divide the red velvet lava cake batter evenly among the prepared ramekins. Fill them almost to the top, leaving a small space (about 1/4 inch) as these cakes do not rise significantly.
-
Prepare Instant Pot: Pour 1 cup of water into the inner pot of your Instant Pot. Place the metal trivet (usually included with your Instant Pot) inside the pot.
-
Load Ramekins & Seal: Carefully place the filled ramekins on top of the trivet in the Instant Pot. You can stack them carefully if needed, or place them side-by-side depending on your Instant Pot size. Secure the lid on the Instant Pot and make sure the sealing valve is set to the “Sealing” position.
-
Pressure Cook: Select the “Pressure Cook” (or “Manual”) function and set the cooking time to 9 minutes on high pressure.
-
Quick Release & Remove: Once the 9 minutes of cooking time are complete, immediately perform a quick release by carefully moving the sealing valve to the “Venting” position. Allow all the steam to fully escape. Once the float valve drops, open the lid. Using oven mitts or a towel, carefully remove the very hot ramekins from the Instant Pot.
-
Serve Immediately: To serve, gently run a knife around the edge of each ramekin, then invert the cake onto a serving plate. Enjoy immediately while warm, garnished with a dusting of powdered sugar and/or a generous scoop of vanilla ice cream.
Video
Notes
- The specified cooking time of 9 minutes does not include the time it takes for the Instant Pot to come to pressure, which can vary based on the amount of water and initial temperature.
- This recipe was developed and tested using an 8 qt Instant Pot. Cooking times may vary slightly with different Instant Pot models or sizes.
- For the best experience, serve these delicious lava cakes immediately while still warm. The perfect accompaniments are a light dusting of powdered sugar or a generous scoop of creamy vanilla ice cream.
- You can easily scale this recipe up or down depending on how many ramekins you can fit comfortably on your Instant Pot trivet.
Nutrition
Nutrition information is automatically calculated, so should only be used as an approximation.
Additional Info
Like this recipe? Leave a comment below!
More Delicious Desserts You’ll Enjoy
If you loved this Instant Pot Red Velvet Lava Cake, be sure to explore these other fantastic dessert recipes:
- Fruity Pebble Cheesecake
- Nutella Chocolate Cake for Two
- Deep-Fried Oreos
- Strawberry Cake
You can find even more delicious recipes and cooking tutorial videos on YouTube and Facebook. Happy cooking!
